
listVue Firebase Masterclass
เพิ่ม webhook
สารบัญ
ต้องเตรียมอะไรบ้างสำหรับทำ webhook
Document ต้นฉบับ: https://docs.opn.ooo/th/api-webhooks/thailand
ตอนนี้เราทำการเพิ่ม placeorder และพาไปยัง payment gateway เรียบร้อย
- step ต่อมา เราต้องเพิ่ม api อีกหนึ่งตัวคือ webhook เพื่อทำการรับสถานะจาก payment gateway เข้ามา
- webhook เป็น HTTP Post ที่จะคอยแจ้งเตือนความเคลื่อนไหวทั้งหมด โดยหลังจากที่มีการ update status อะไรก็ตามที่เกิดขึ้นที่ payment ของ Omise = Omise จะทำการส่งข้อมูลกลับมาผ่าน Event ใน webhook พร้อม data ที่เกิดขึ้นออกมาได้
โดยสิ่งที่เราจะต้องทำคือ
- api wehbook ที่รับเป็น http post (ถ้าเป็นตัวจริง จะต้องทำเป็น https ด้วยนะ)
- endpoint webhook ที่จะนำไปใส่ใน dashboard omise (เพื่อบอกว่า webhook อยู่ที่ไหน) = ซึ่งจะต้องนำ webhook ขึ้น server ก่อน
เพิ่ม webhook ที่ cloud function
สิ่งที่จะเพิ่ม
- เพิ่ม API POST /webhook เข้ามาใน cloud function
- ดักจับจาก
req.body.key(ตามเอกสารของ webhook ต้องจับจาก keycharge.complete) - นำ orderId (ที่แนบไปกับ metadata ของ omise) ดึงข้อมูลออกมาเพื่อ map กับ Firestore ว่า orderId มีค่าเท่าไหร่
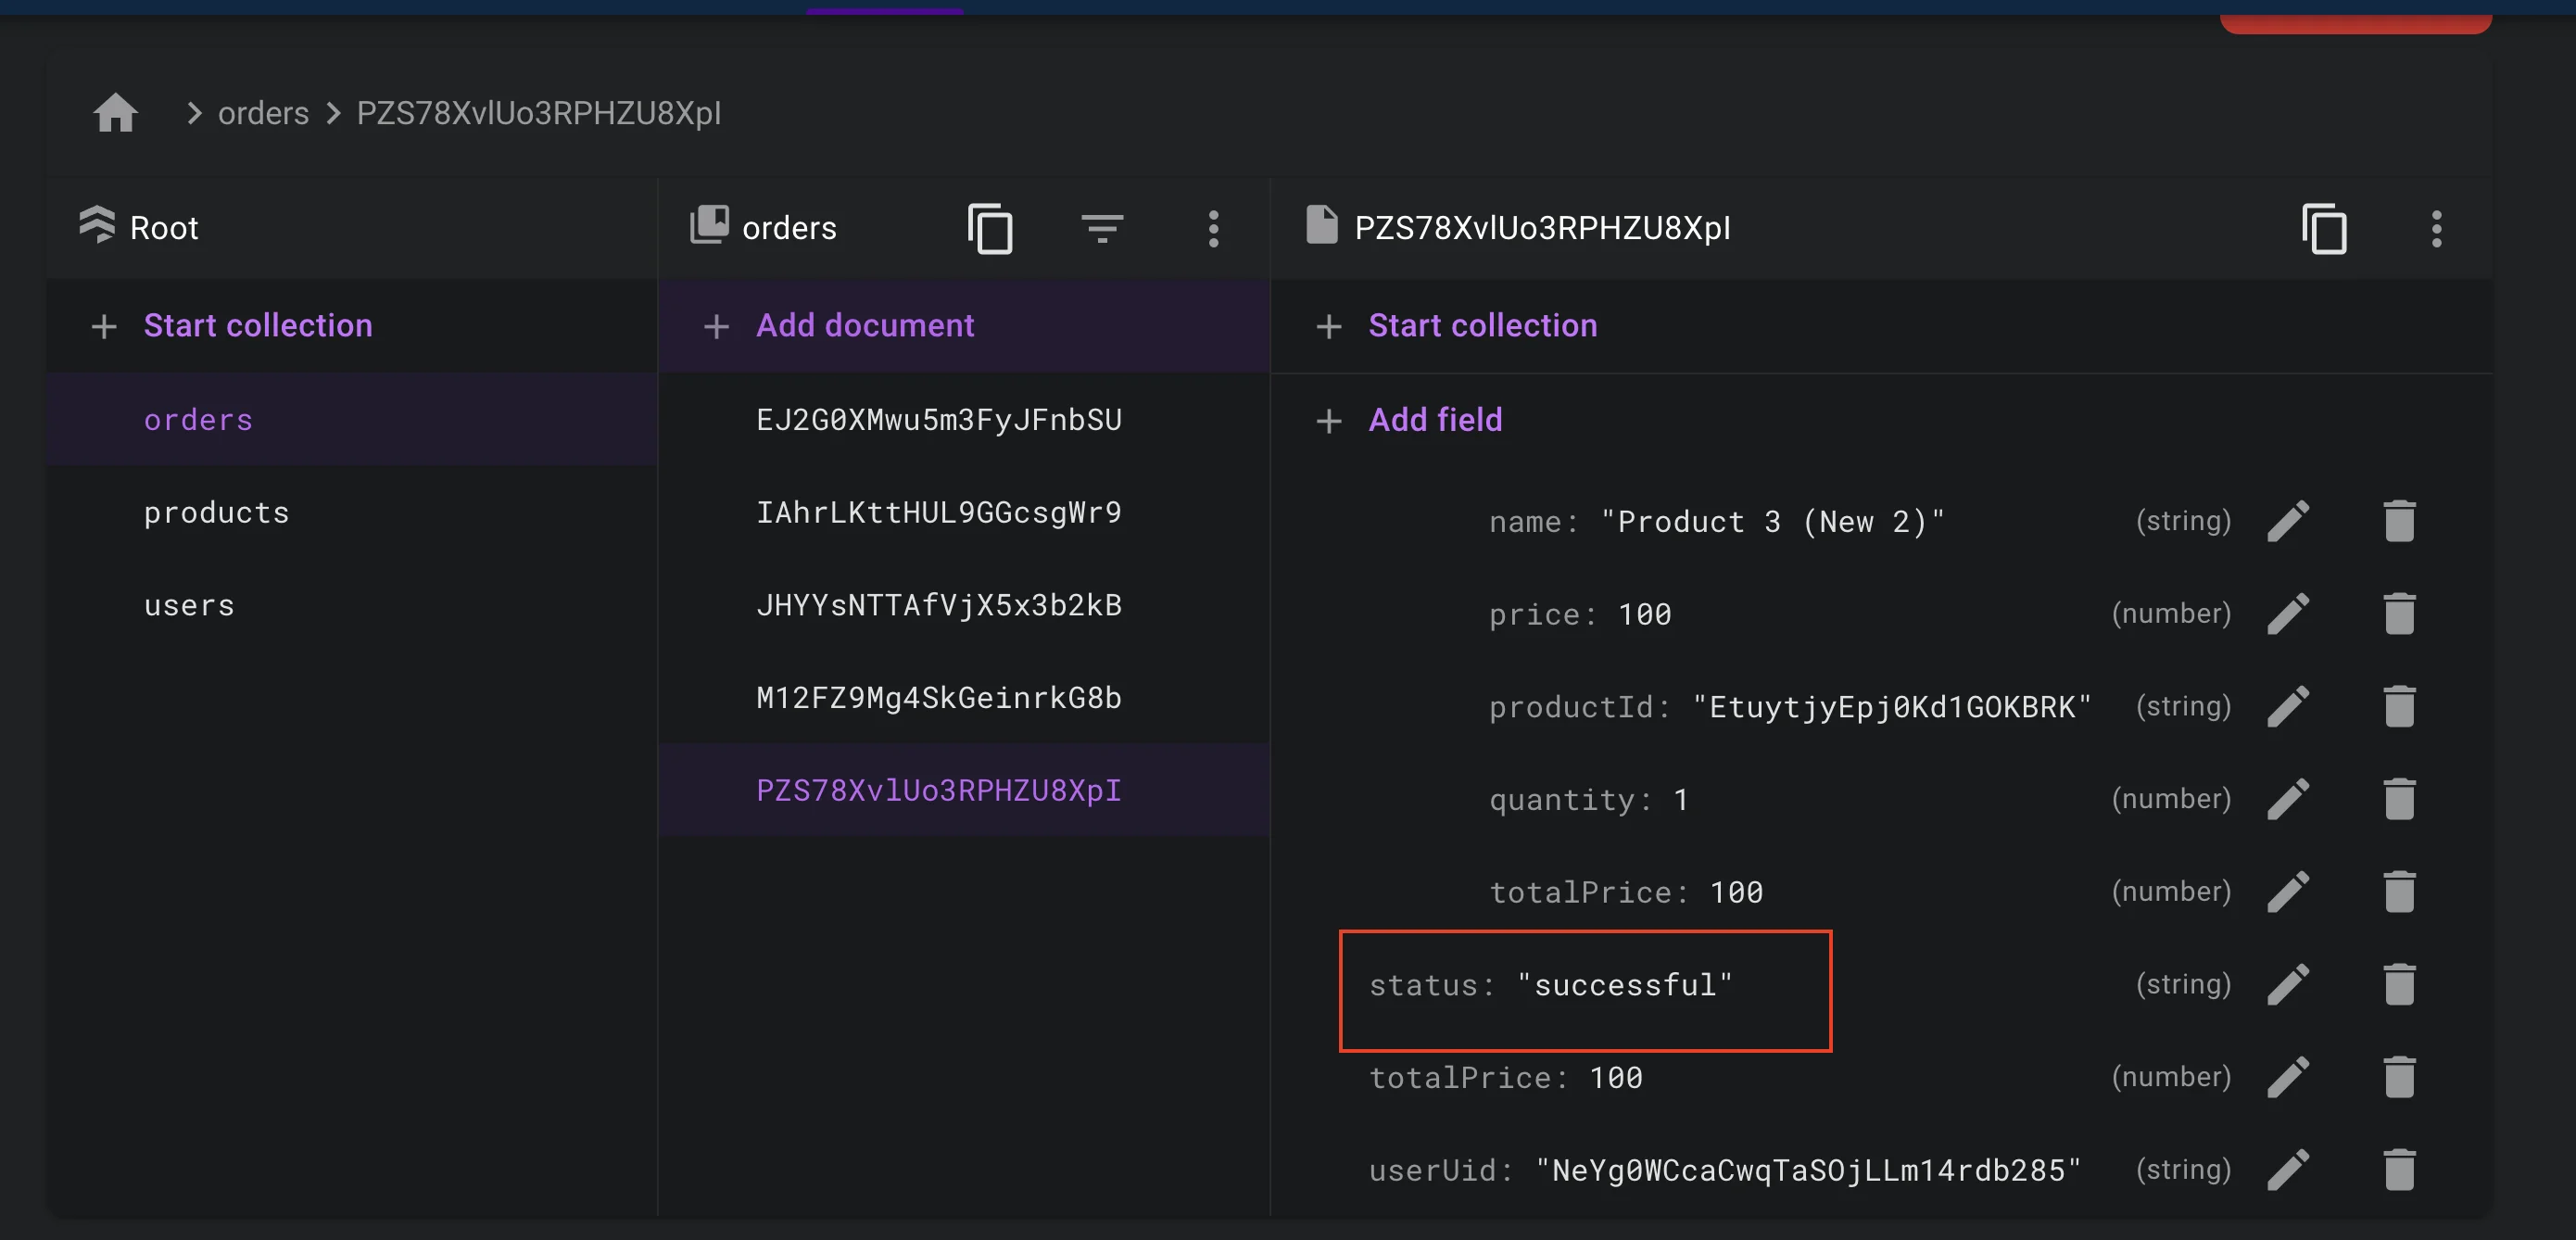
- check status ก่อน update ว่าเป็น pending หรือไม่ ? ถ้า ใช่ = update เป็น status
successfulออกมาได้
app.post('/webhook', async (req, res) => {
  try {
    if (req.body.key === 'charge.complete') {
      const paymentData = req.body.data
      console.log(paymentData.status)
      const chargeId = paymentData.id
      const orderId = paymentData.metadata.orderId

      const orderRef = db.collection('orders').doc(orderId)
      const orderSnapshot = await orderRef.get()
      const orderData = orderSnapshot.data()

      // check correct order
      if (
        orderData.chargeId === chargeId &&
        orderData.status === 'pending'
      ) {
        await orderRef.update({
          status: paymentData.status
        })

        if (paymentData.status !== 'successful') {
          // คืน stock
          await db.runTransaction(async (transaction) => {
            for (const product of orderData.products) {
              const productRef = db.collection('products').doc(product.productId)
              const snapshot = await transaction.get(productRef)
              let productData = snapshot.data()
              productData.remainQuantity += product.quantity
              transaction.update(productRef, {
                remainQuantity: productData.remainQuantity
              })
            }
          })

          console.log('restore stock success')
        }
      }

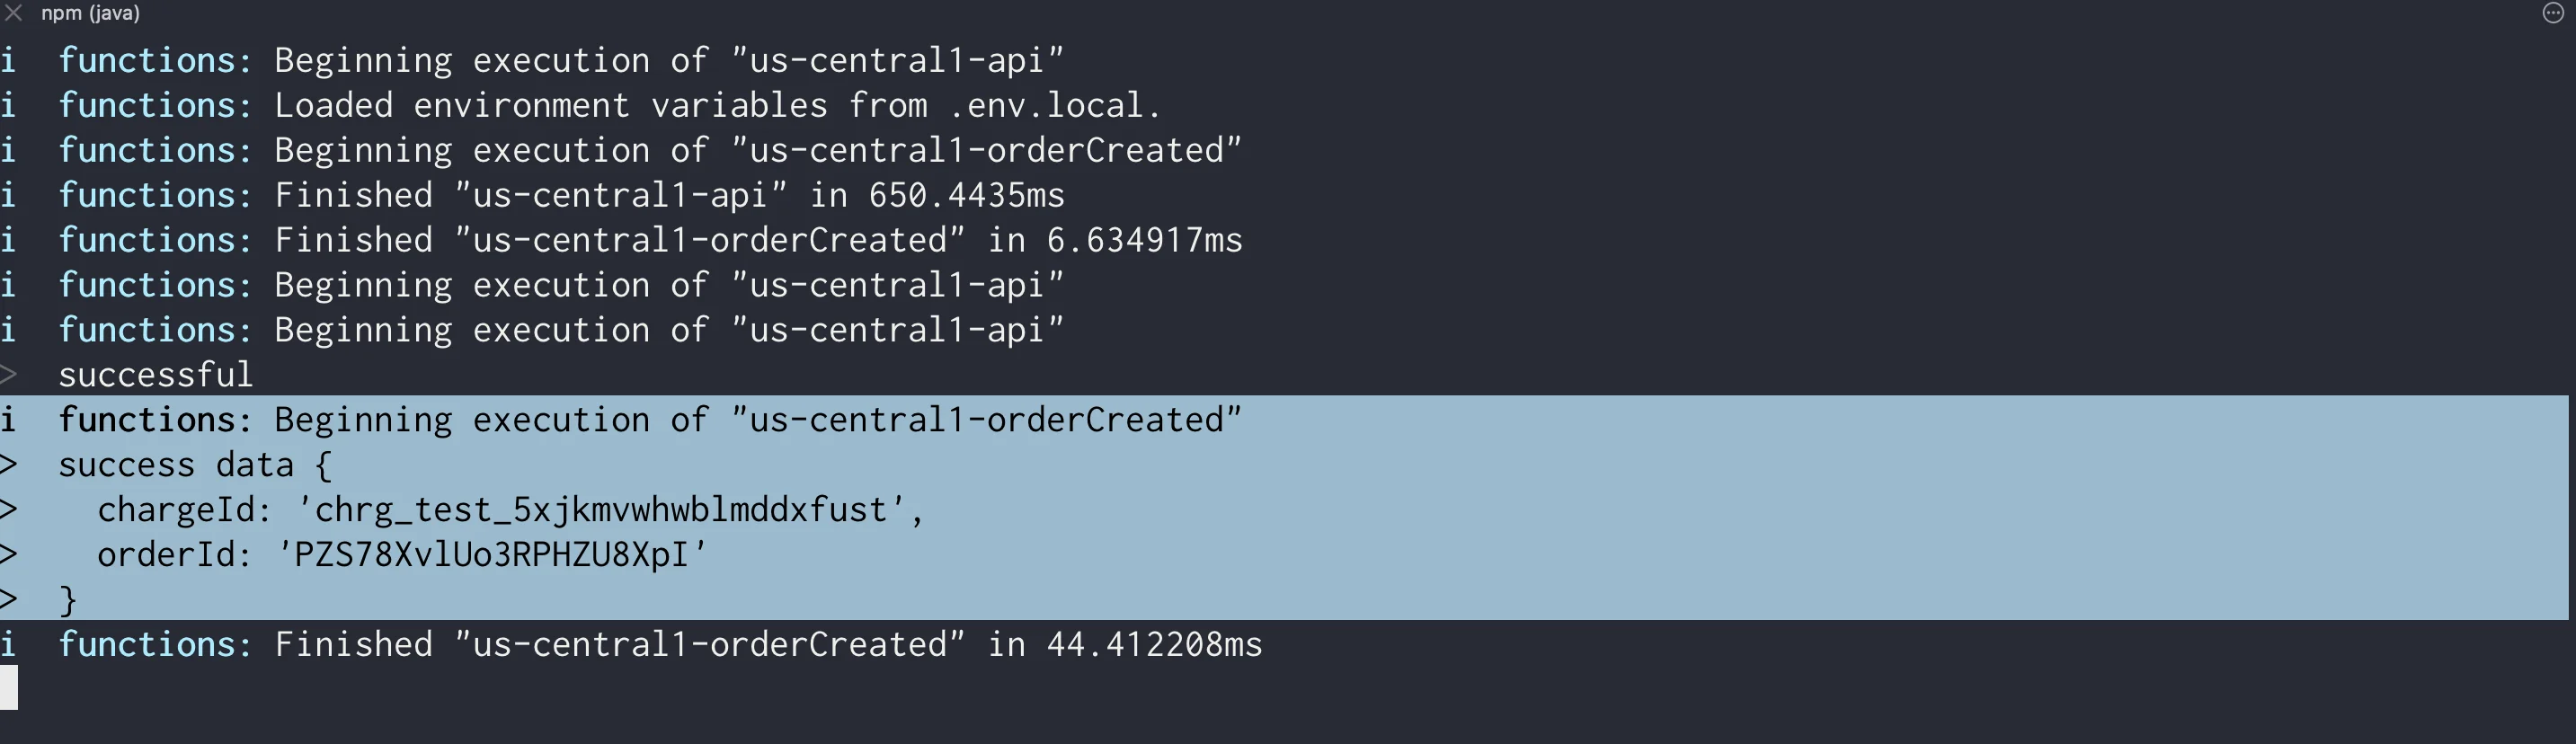
      console.log('success data', {
        chargeId,
        orderId
      })
    }
  } catch (error) {
    console.log('error', error)
  }
})
ทีนี้เพื่อที่เราจะไม่ต้องปั้น request เพื่อมาทดสอบเอง เราจะนำ cloud function ออก server ข้างนอกผ่าน ngrok กัน
ngrok คืออะไร ?
Ngrok คือ API ingress ที่ทำให้เราสามารถนำสิ่งที่ run บน local ออกสู่ server แบบชั่วคราวด้วย command บรรทัดเดียวได้
สามารถ download ได้ผ่านเอกสารของ ngrok ได้เลย https://ngrok.com/download
เมื่อทุกอย่างถูกต้องให้ลองรันคำสั่ง ngrok ดู
ngrokถ้าไม่ได้คำว่า command not found มา และได้ผลลัพธ์คล้ายๆภาพนี้ออกมา = ถือว่าลง ngrok อย่างถูกต้องแล้ว
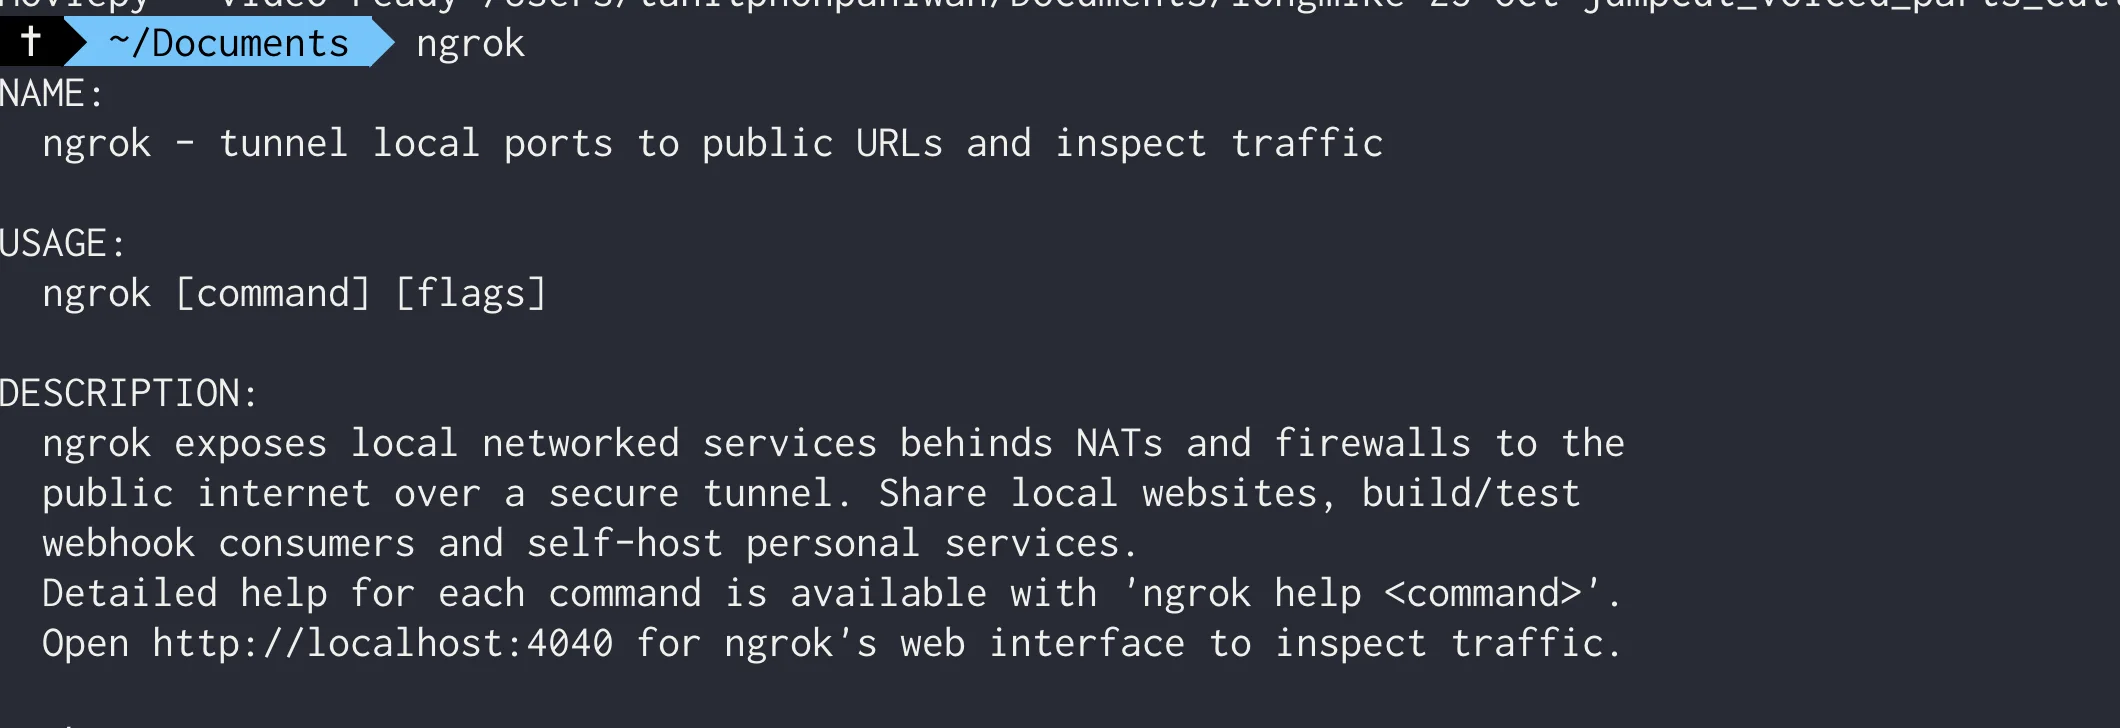
เพิ่ม ngrok เพื่อให้ omise ยิงเข้ามา
หลังจากนั้นเราจะทำการ bind function ของ cloud function เข้ามาโดย
- หากเรา run cloud function อยู่ที่ port ไหน (เช่นของผม run อยู่ที่ 5010)
- ให้ run คำสั่ง
ngrok http <port ของ cloud function>ได้เลย เช่นเคสของผมคือngrok http 5010(แต่ละเครื่องอาจจะมี port ออกมาไม่เหมือนกัน)
เมื่อทำการ run จะได้เป็น ngrok server ตัวนี้ออกมา
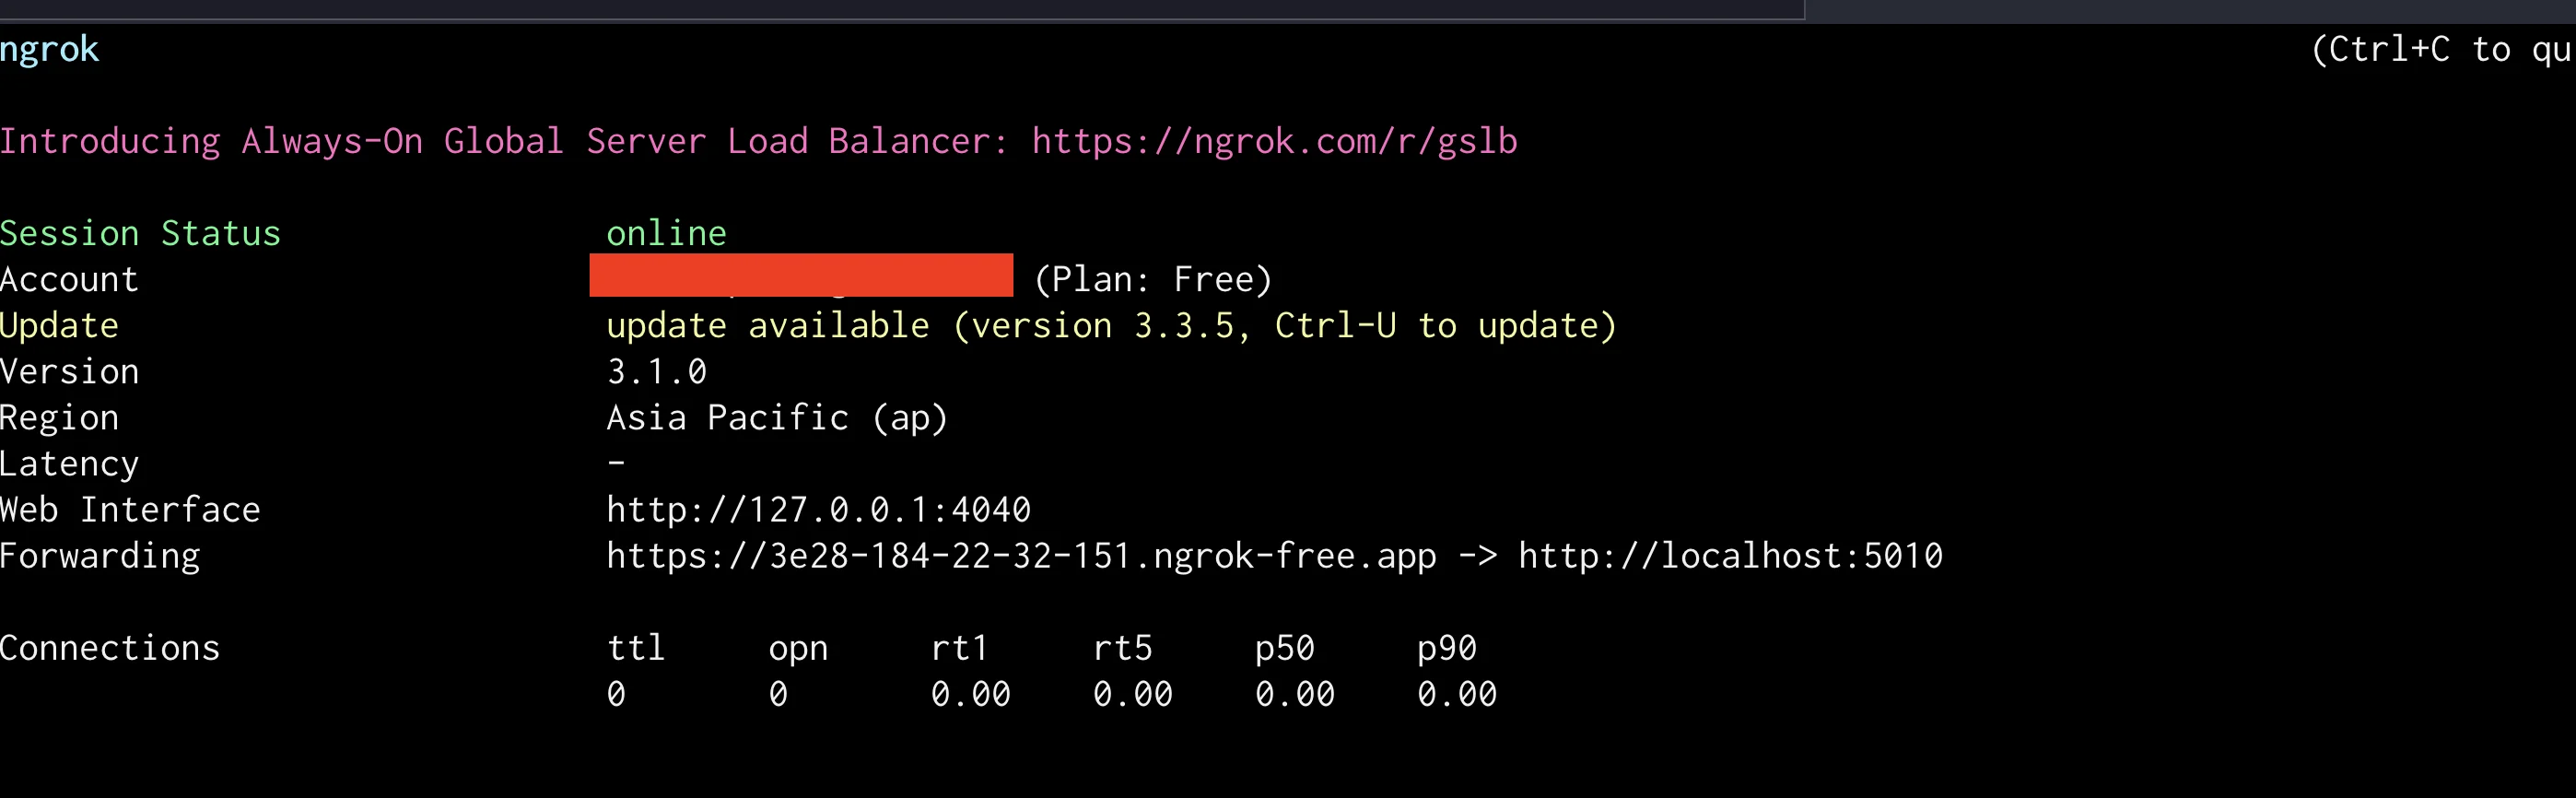
จากภาพนี้จะเจอว่า ngrok ได้ทำการผูก domain ไว้กับ port 5010 ตามภาพนี้แล้ว
https://3e28-184-22-32-151.ngrok-free.app -> http://localhost:5010ดังนั้นหากเราทำการยิง request เข้า https://3e28-184-22-32-151.ngrok-free.app จะมีค่าเทียบเท่ากับ http://localhost:5010 ออกมาได้
เพิ่ม webhook ใน omise
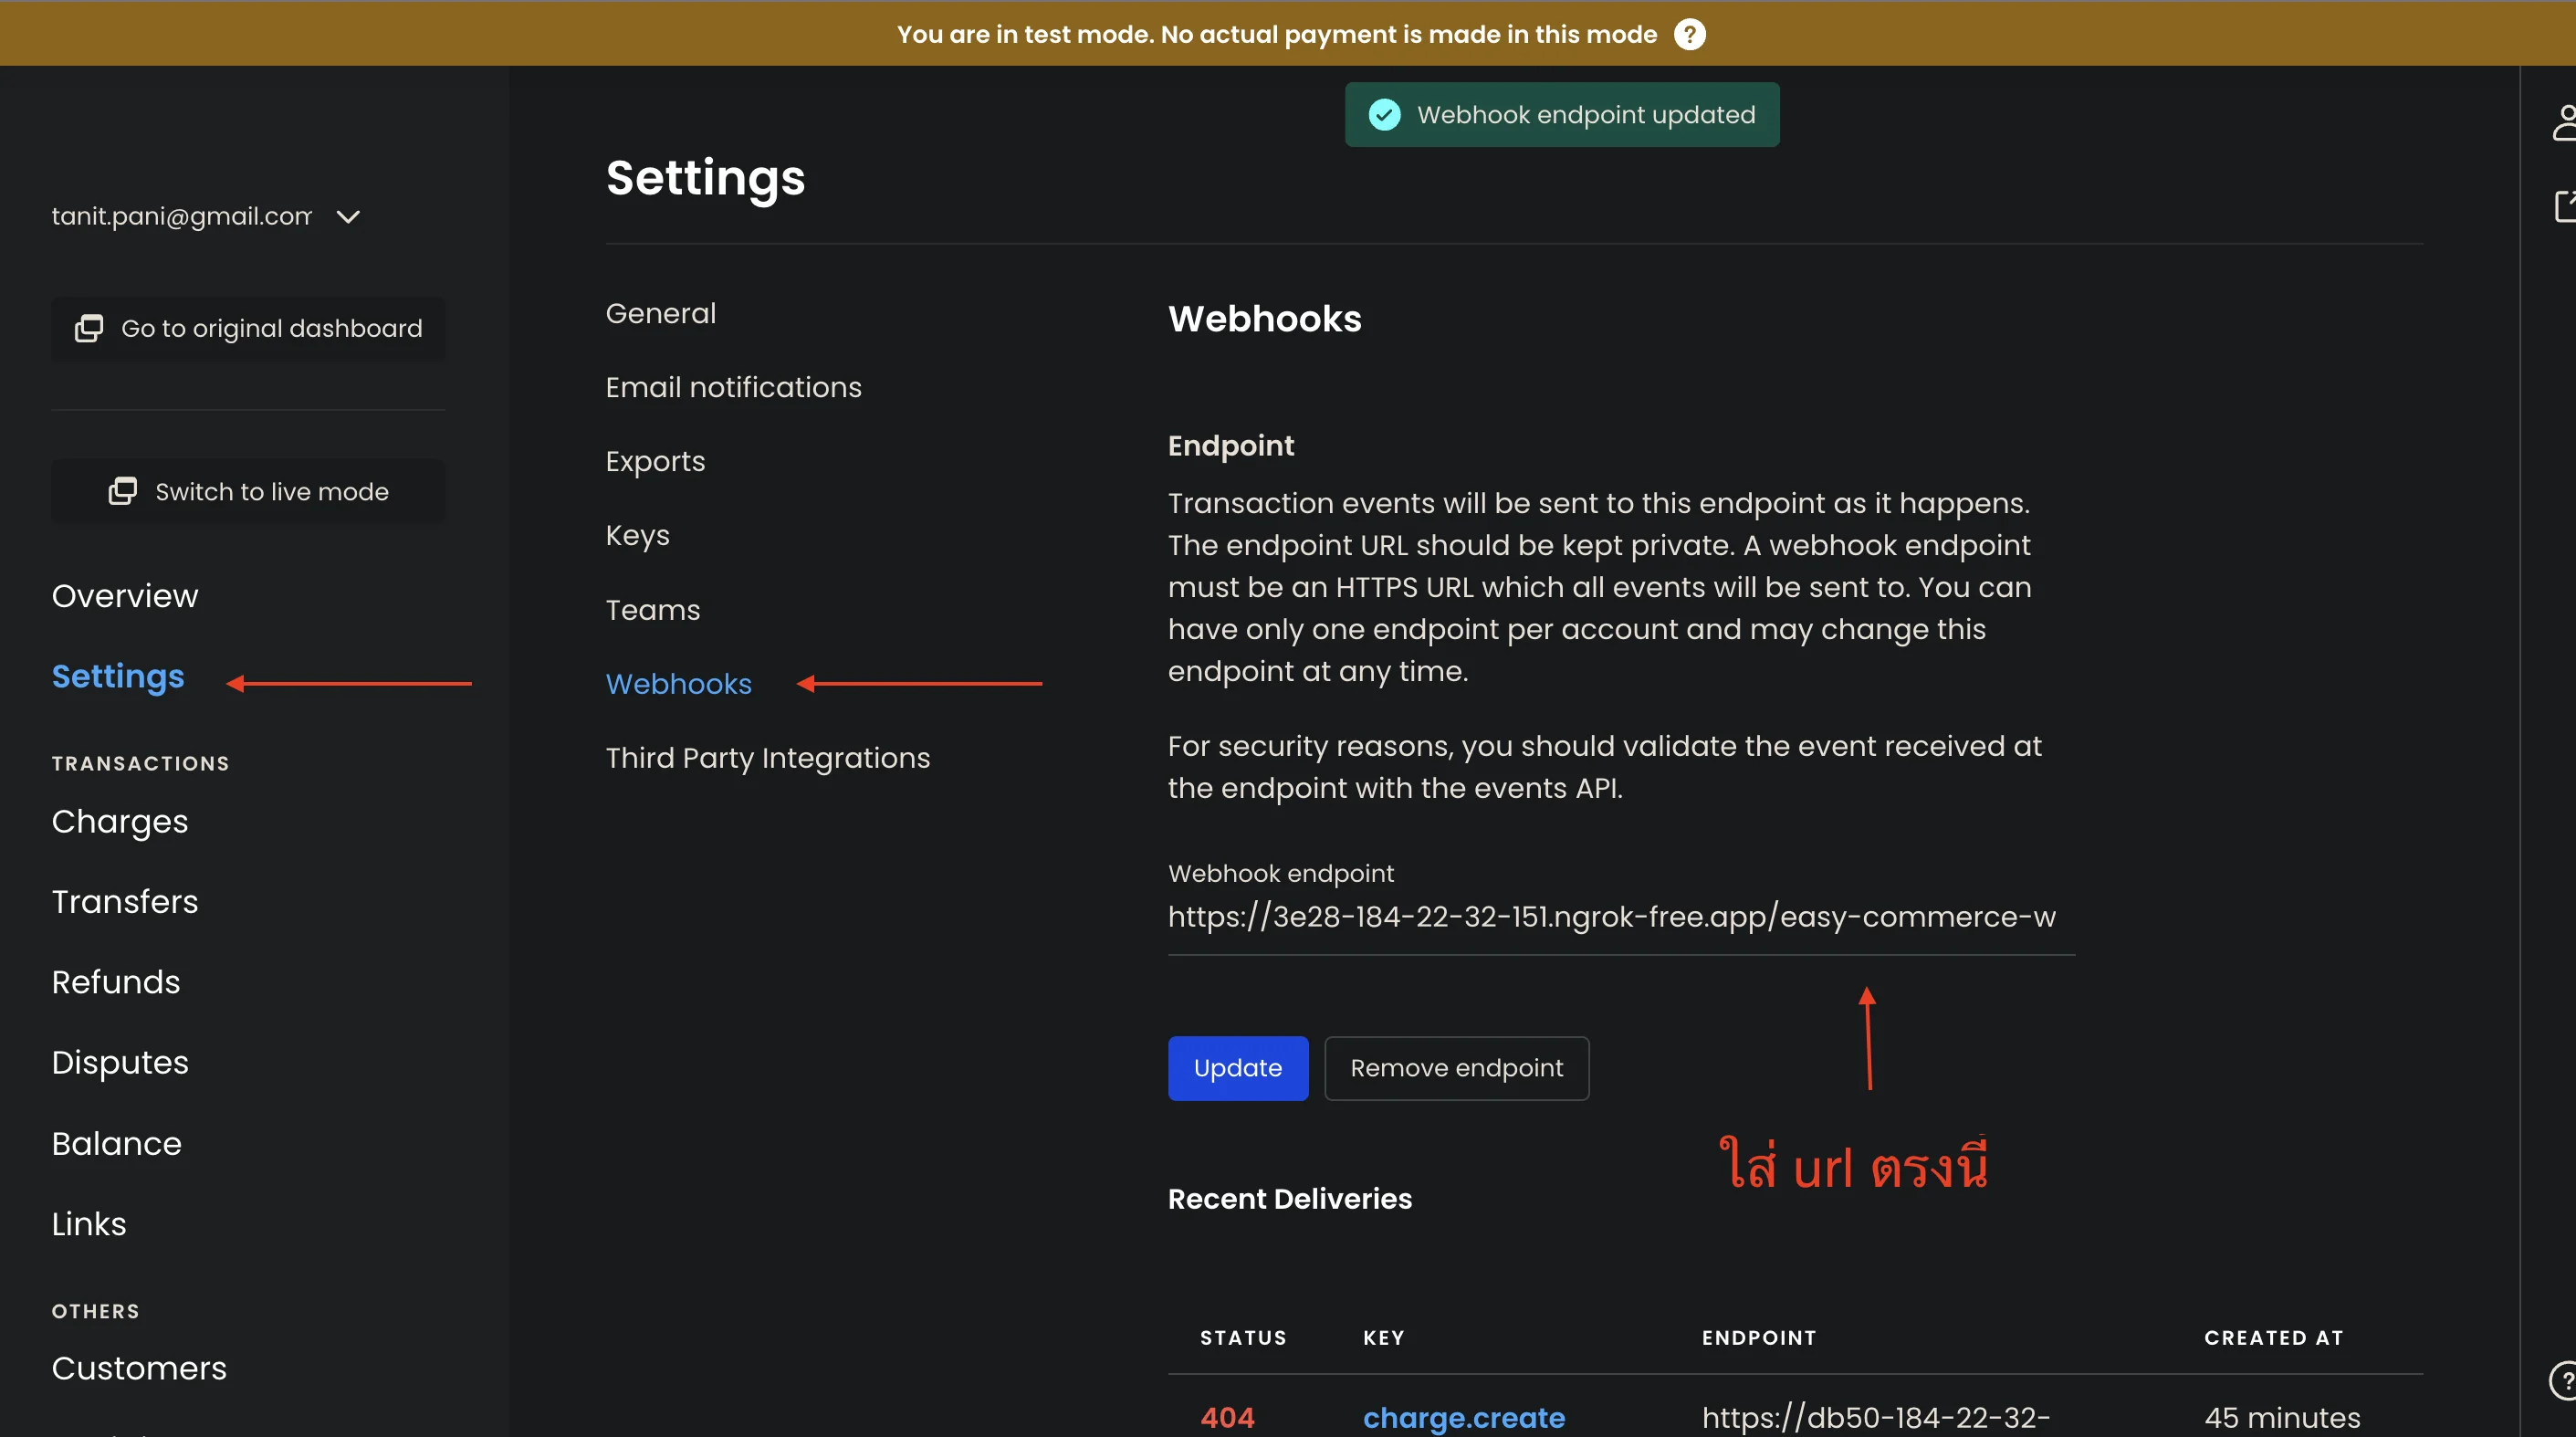
Step ต่อไป เราจะไปเพิ่ม ngrok ใน webhook ของ omise กัน เราจะต้องนำ path เต็มของ webhook เข้าไปวางใน cloud function โดย
ถ้า cloud function ของเรามี path เป็น
http://127.0.0.1:5010/easy-commerce-workshop/us-central1/api/webhookpath ngrok ก็จะเป็น
https://3e28-184-22-32-151.ngrok-free.app/easy-commerce-workshop/us-central1/api/webhookให้นำ path เต็มที่ไปใส่ที่ Dashboard omise ในหัวข้อ Settings > Webhooks และใส่ url ไปตามภาพนี้เลย
เมื่อเรียบร้อยทั้งหมดดูผลลัพธ์ทั้งหมด โดยการลองทดสอบผ่านการเล่นผ่าน placeorder ทั้งหมดดู
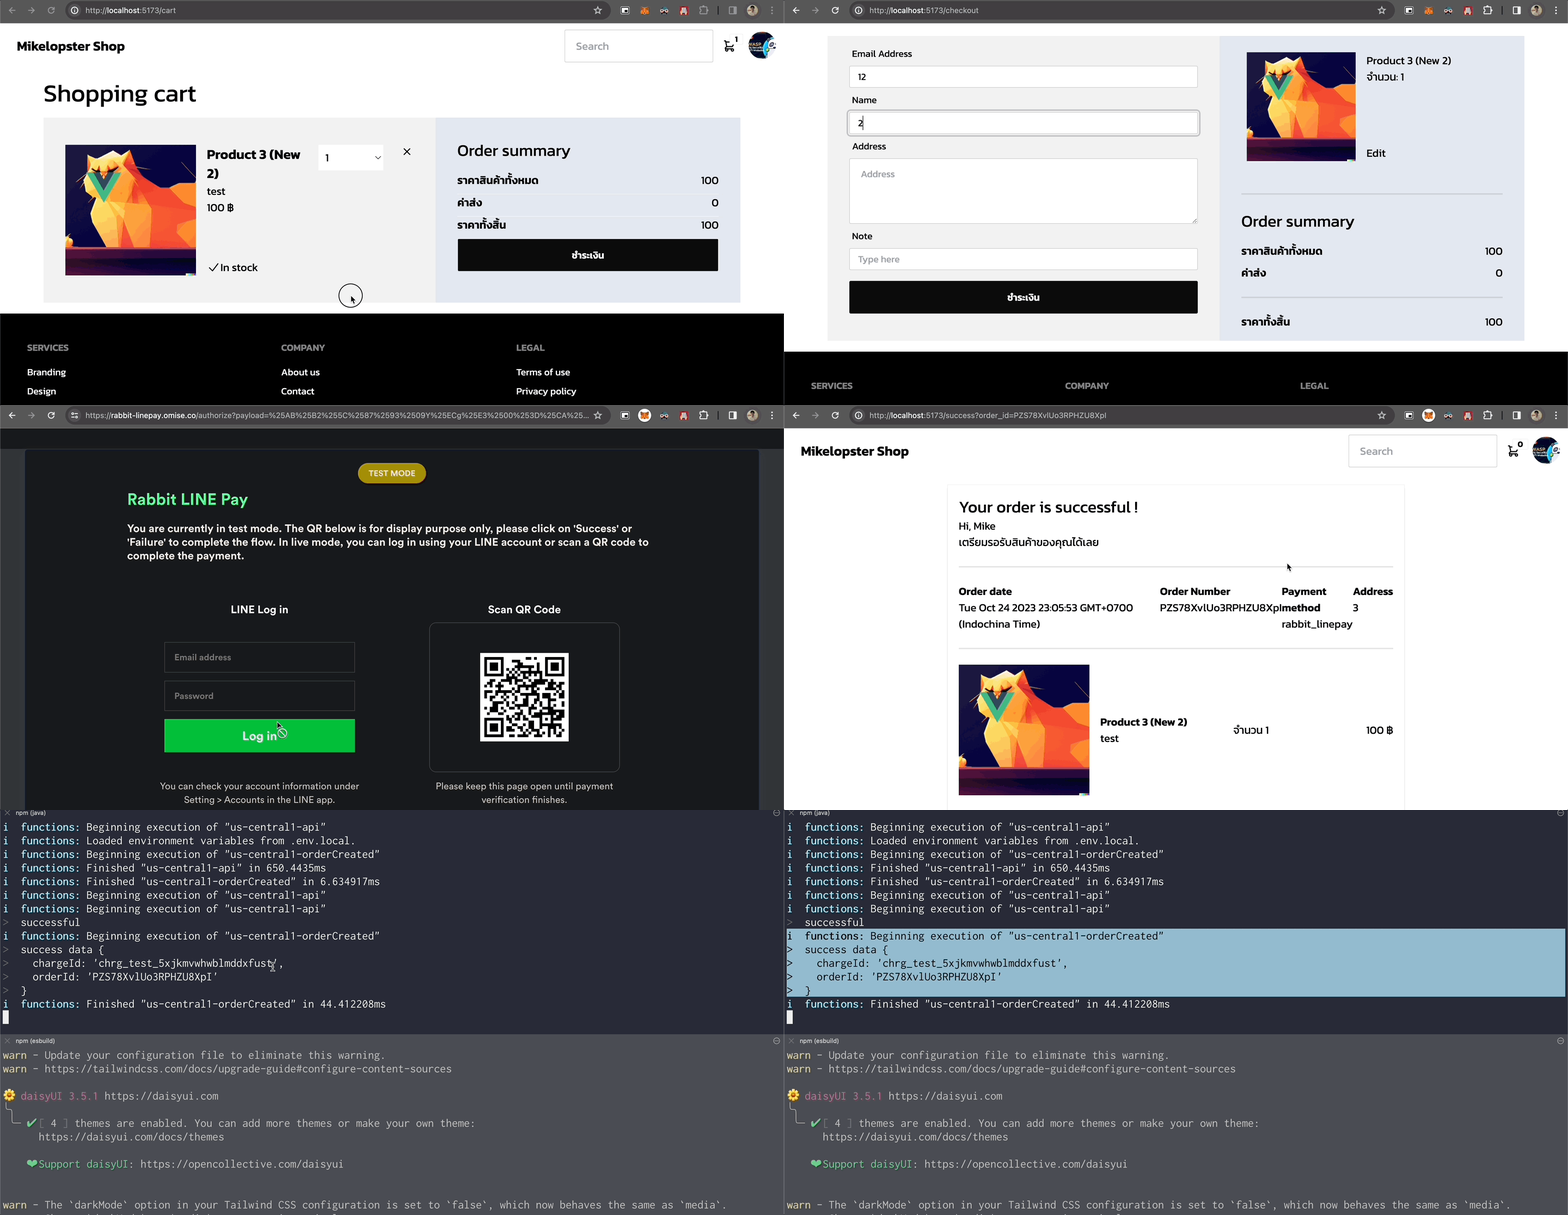
ก็จะเจอว่า console.log (ที่เพิ่มไว้ใน webhook) โดน trigger เรียบร้อย
และเมื่อลองกลับมาดูที่ Firestore ของตัว order เดียวกันก็จะเจอว่ามี status successful เป็นที่เรียบร้อย
เป็นอันจบการผูก payment Omise เข้ากับเว็บของเรา