listVue Firebase Masterclass
ปรับ Placeorder
สารบัญ
หลักการของ Omise เป็นแบบไหน ?
Document ต้นฉบับ: https://docs.opn.ooo/th/rabbit-linepay/thailand
ทีนี้ Omise นั้น support การจ่ายเงินหลากหลายประเภทมาก (สามารถดูเอกสารได้) เราจะเลือกการชำระเงินเป็น
- เแบบ rabbit line pay เนื่องจาก เป็นลักษณะของการ link out ออก (ซึ่งเป็นรูปแบบที่ implement ง่ายที่สุด)
- แต่สามารถนำไปประยุกต์ใช้กับทุกแบบได้
ก่อนที่จะมีการลง library เรามาทำความเข้าใจ library และ flow ของ omise กันก่อน
Document ต้นฉบับ: https://docs.opn.ooo/th/omise-js/thailand

- ในการเชื่อม Omise นั้นเราจะมี library อยู่ 2 ฝั่งคือ
- ฝั่ง Frontend = Omise.js
- ฝั่ง Backend = omise-node
โดย concept โดยประมาณคือ
- ฝั่ง Frontend จะทำการสร้าง source token ออกมา (โดยสร้างจาก public key ของ Omise.js)
- ฝั่ง Frontend จะทำการส่ง source token เข้าไปในฝั่ง Backend และทำการ validate source token (ผ่าน secret key ของ Omise) และสร้างเป็น charge ขึ้นมา (เมื่อ token และราคาออกมาถูกต้อง)
ทำการลง Library omise
เราจะทำการลง Library และ setup key ทั้ง 2 ฝั่งกันก่อน อย่างแรกสุดให้เตรียม key เอาไว้ โดยการเข้าไปที่ setting > key (ตามภาพนี้)
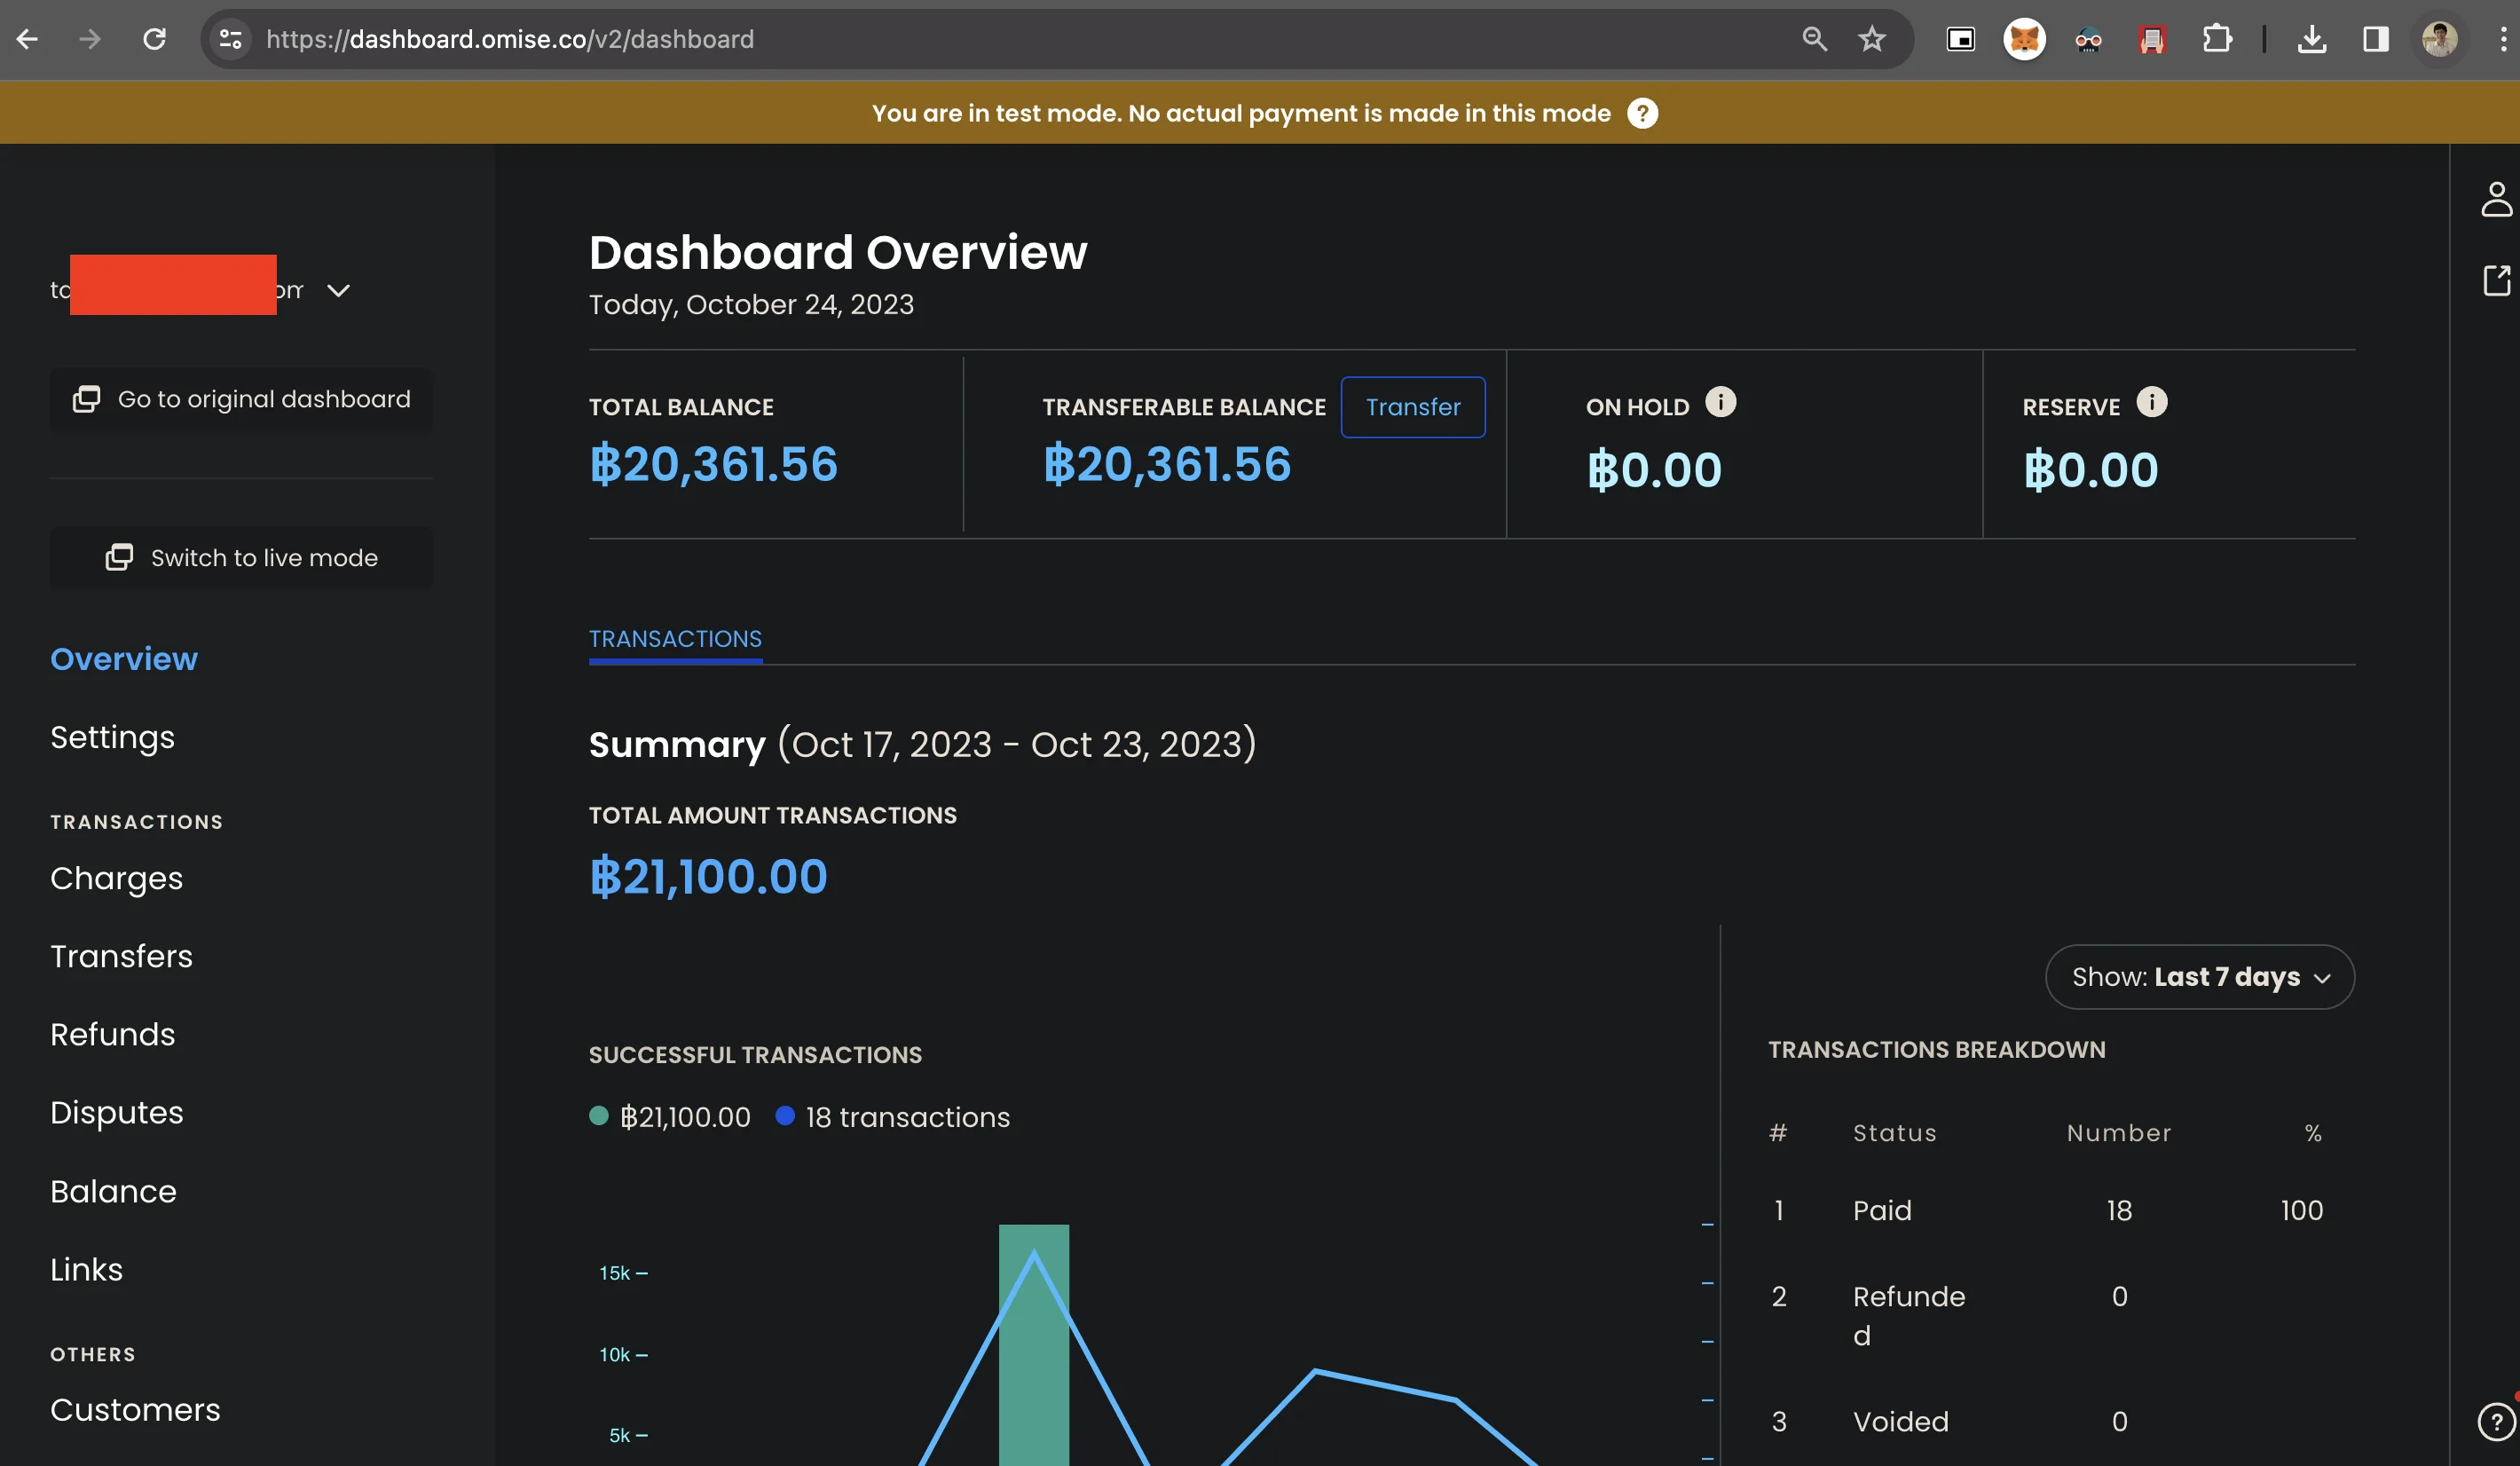
จะเจอ public key (ใช้สำหรับ Frontend) และ secret key (ใช้สำหรับ Backend)
เพิ่ม Library ฝั่ง Frontend
import library Omise.js
ฝั่ง Frontend เราจะทำการเพิ่มที่ layer นอกสุดคือ index.html เลย เนื่องจากเราต้อง import ผ่าน cdn เข้ามาผ่าน tag script = เราเลยจะทำการ import ตำแหน่งนอกสุด เพื่อให้มันสามารถเรียกใช้งานแบบ global ได้
index.html
<!DOCTYPE html>
<html lang="en" data-theme="lofi">
  <head>
    <meta charset="UTF-8">
    <link rel="icon" href="/favicon.ico">
    <meta name="viewport" content="width=device-width, initial-scale=1.0">
    <title>Vite App</title>
  </head>
  <body>
    <div id="app"></div>
    <!-- เพิ่ม script omise เข้ามา -->
    <script type="text/javascript" src="https://cdn.omise.co/omise.js"></script>
    <script type="module" src="/src/main.js"></script>
  </body>
</html>
เพิ่ม env ให้ public key
Document ต้นฉบับ: https://vitejs.dev/guide/env-and-mode.html
หลังจากนั้น เราจะทำการเพิ่ม env เข้าไปสำหรับส่วนของ public key
- ไม่ควร fix code ไว้เนื่องจาก มันจะทำให้เราไม่สามารถทำหลาย environment ได้
- ตัว vite อำนวยความสะดวกเรื่อง .env ให้แล้ว ด้วยการเพิ่มผ่าน
.env.localเข้าไปได้
ทำการเพิ่ม public key ของ omise ของเราเข้าไปผ่าน key VITE_OMISE_PUBLIC_KEY
VITE_OMISE_PUBLIC_KEY=pkey_test_xxxxหลังจากนั้น เราจะสามารถเรียกค่า env ผ่าน import.meta.env.VITE_OMISE_PUBLIC_KEY ออกมาได้
เพิ่ม setup Omise ที่ stores/cart.js
สุดท้ายที่ stores/cart.js เราจะทำการเรียกใช้ Omise library เพื่อ setup public key เริ่มต้น
import { defineStore } from 'pinia'
import axios from 'axios'

/* code เหมือนเดิม */

// เพิ่มบรรทัดนี้เข้ามา
Omise.setPublicKey(import.meta.env.VITE_OMISE_PUBLIC_KEY)

export const useUserCartStore = defineStore('user-cart', {
  /* code เหมือนเดิม */
})
ถ้าไม่เกิด Error อะไรออกมาใน console = แปลว่าเราได้ทำการลงอย่างถูกต้องแล้ว
เพิ่ม Library ฝั่ง Backend (Cloud function)
ลง omise-node
ที่ Backend เราจะทำการลง library ชื่อ omise-node เพื่ออำนวยความสะดวกในการส่งข้อมูลเข้าไปที่ฝั่ง omise
library: https://github.com/omise/omise-node
เข้าไปใน folder functions/index.js ทำการลงด้วยคำสั่ง
npm install omiseเพิ่ม env Secret key
Document ต้นฉบับ: https://firebase.google.com/docs/functions/config-env?gen=2nd
หลังจากนั้น เหมือนกันกับฝั่งของ Frontend เราจำเป็นต้องเพิ่ม env ของ cloud function เข้าไปเช่นกัน เราจะทำการเพิ่ม secret key เข้าไปใน env เพื่อให้สามารถเรียกใช้งานเพื่อ setup ของ cloud function ได้
สร้าง .env.local ขึ้นมา และเพิิ่ม secret key ของ omise เข้าไป
OMISE_SECRET_KEY=skey_test_xxxxเพียงเท่านี้ก็จะสามารถเรียกผ่าน process.env.OMISE_SECRET_KEY ของ cloud function ได้
เพิ่ม setup library omise functions/index.js
ทำการ import library omise เข้ามาและอ่านค่า secret key เข้าไป ตามตำแหน่งของ document
const omise = require('omise')({
  secretKey: process.env.OMISE_SECRET_KEY,
  omiseVersion: '2019-05-29'
})
เพิียงเท่านี้ เราก็จะสามารถใช้คำสั่ง omise เป็นตัวแทนในการยิงไปยัง omise server ได้
ปรับ API placeorder
ตอนนี้เรา setup omise ทั้ง 2 ฝั่งเรียบร้อย เราจะลองมาเชื่อม placeorder เข้ากันทั้ง 2 ฝั่งกัน เริ่มจาก
- ฝั่ง Frontend: ต้องเปลี่ยนจุดส่ง source ที่ mock ไว้เป็น Omise source จริงๆ จาก library Omise.js
- ฝั่ง Backend: ต้องเปลี่ยนจุด charge ที่ mock ไว้เป็น Omise charge จริงๆ จาก library omise-node
(ซึ่งทั้ง 2 คำสั่งนั้น ใน document ด้านบนของ Omise มีคำแนะนำไว้แล้วเช่นกัน)
เพิ่ม Source token ฝั่ง Frontend
ที่ stores/cart.js
- สร้าง function
createSourceขึ้นมาเพื่อรับจำนวนเงินรวม และ ทำการแปลง callback (ของ Omise) เป็น Promise แทน (เพื่อให้สามารถ handle ร่วมกันกับ async, await ได้) และเป็นตัวแทนของการคุยกับ library Omise (เพื่อนำ source token กลับมาจาก omise) - ทำการเรียกใช้
createSourceในcheckoutและทำการส่ง source token ไป
Omise.setPublicKey(import.meta.env.VITE_OMISE_PUBLIC_KEY)

// เพื่อ function createSource
const createSource = (amount) => {
  return new Promise((resolve, reject) => {
    // ทำการส่ง source ที่ต้องการจ่ายไป omise เพื่อนำ source token กลับมา
    Omise.createSource('rabbit_linepay', {
      amount: (amount * 100),
      currency: 'THB'
    }, (statusCode, response) => {
      if (statusCode !== 200) {
        return reject(response)
      }
      resolve(response)
    })
  })
}


export const useUserCartStore = defineStore('user-cart', {
  state: () => ({
    items: [],
    checkout: {}
  }),
  getters: {
    summaryPrice (state) {
      return state.items.reduce((acc, item) => acc + (item.price * item.quantity), 0)
    },
    quantity (state) {
      return state.items.reduce((acc, item) => acc + item.quantity, 0)
    },
    user (state) {
      const accountStore = useAccountStore()
      return accountStore.user
    },
    cartRef (state) {
      return ref(realtimeDB, `carts/${this.user.uid}`)
    }
  },
  actions: {
    async checkout (checkoutData) {
      try {
        let checkout = {
          ...checkoutData,
          products: this.items.map(product => ({
            productId: product.productId,
            quantity: product.quantity
          }))
        }

        // เพิ่มการเรียกขอ source token จาก function createSource
        const omiseResponse = await createSource(this.summaryPrice)
        const sourceId = omiseResponse.id

        const response = await axios.post('/api/placeorder', {
          source: sourceId, // เปลี่ยนมาส่ง source จริงเข้าไปแทน
          checkout
        }, {
          headers: {
            'Authorization': this.user.accessToken
          }
        })
        return response.data
      } catch (error) {
        console.log('error', error.code)
        throw new Error('out of stock')
      }
    },
  }
})
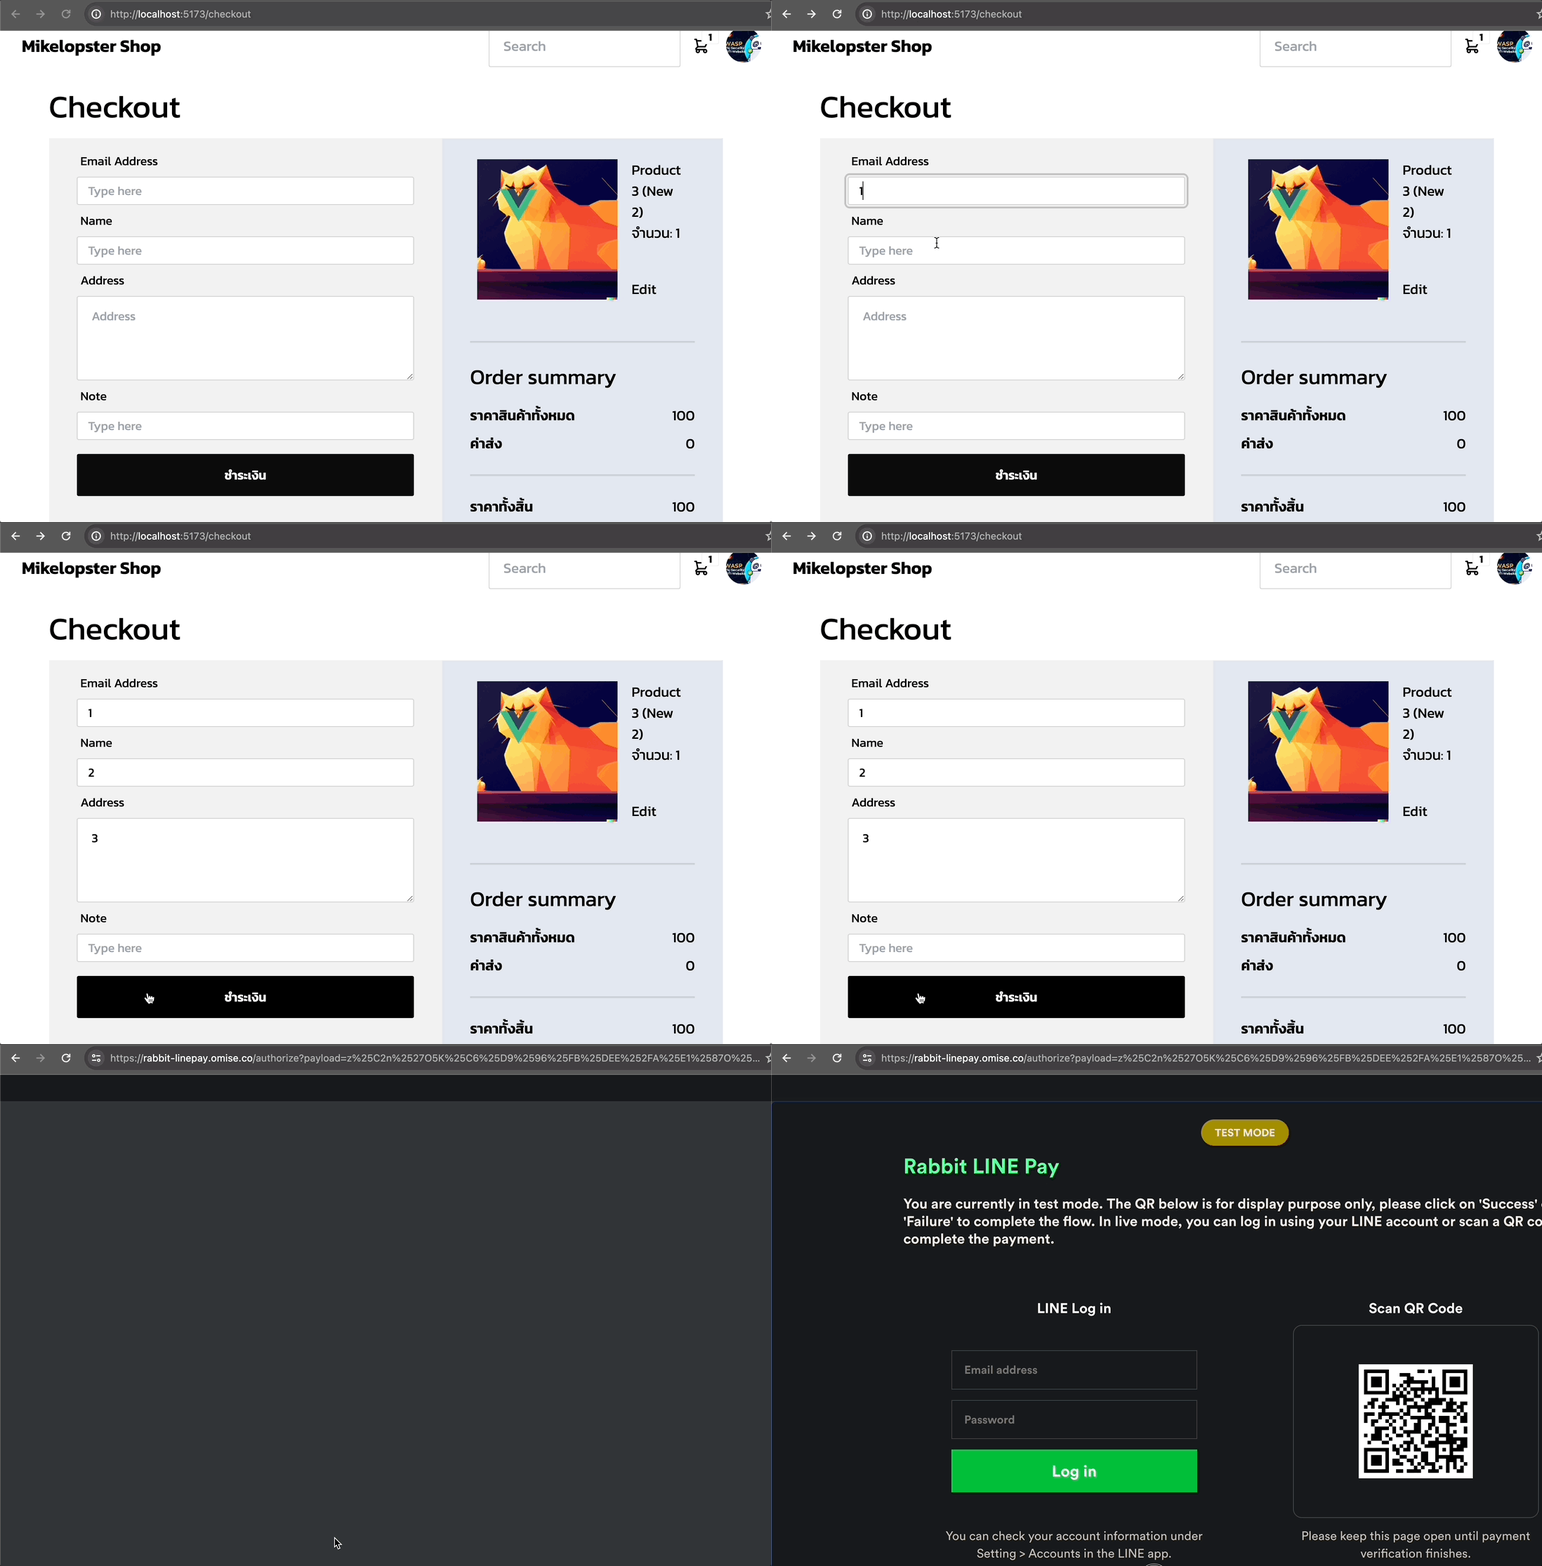
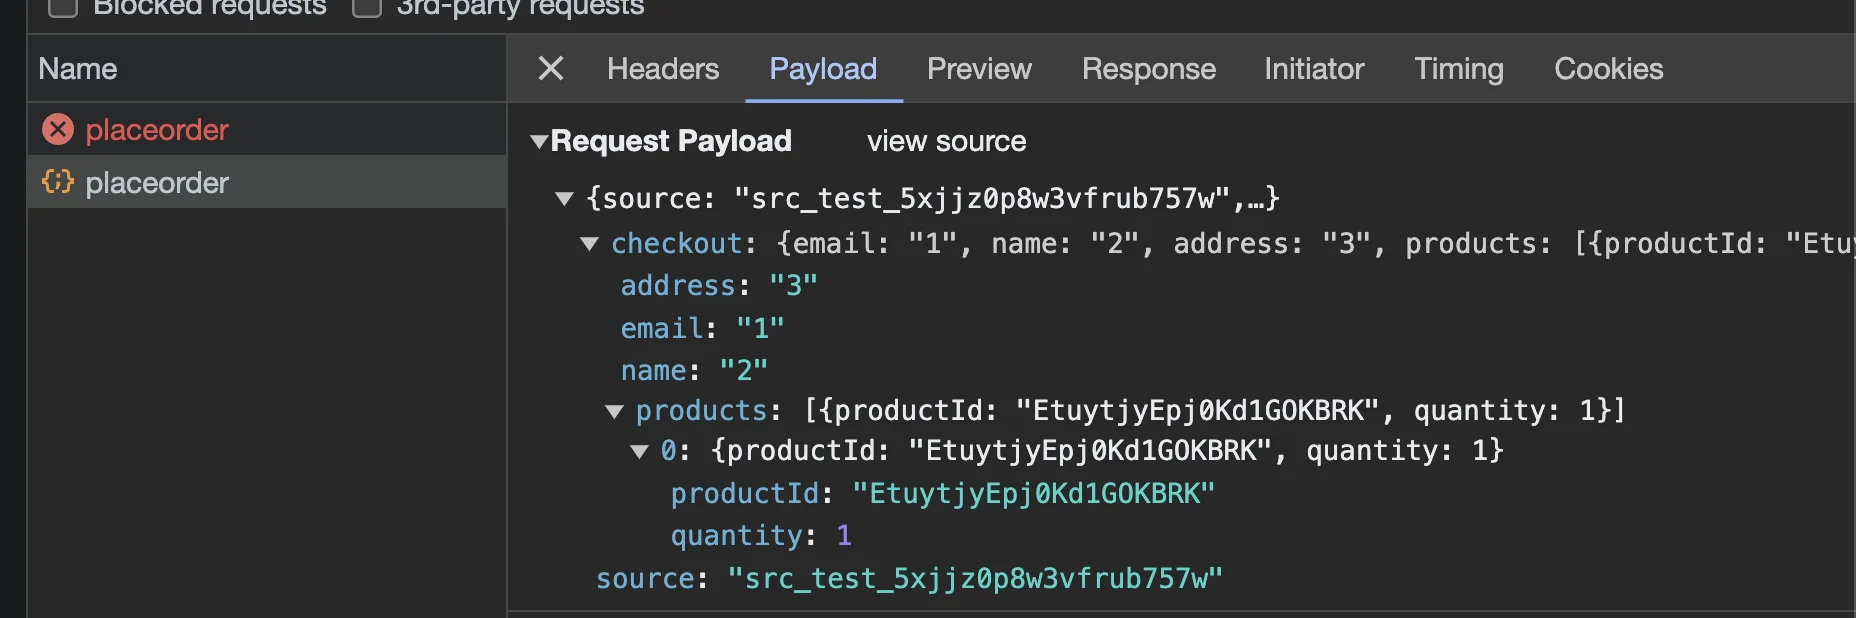
หลังจากนั้นให้ดูค่าของ sourceId ถ้าสามารถออกมาถูกต้องและยิงผ่าน axios ออกมาถูกต้องได้ ถือว่า ok เรียบร้อย
ทีนี้เราจะไปแก้ฝั่ง Backend ให้ url ออกมาถูกต้องก่อน เราจะได้ redirect ไปยัง Payment gateway ที่ถูกต้องออกมาได้
เพิ่ม Charge ฝั่ง Backend
ืีที่ cloud function สิ่งที่เราจะเพิ่มขึ้น
- รับ source token จากฝั่ง Frontend มา แล้วนำมาสร้างเป็น Charge
- ทำการ recheck ตัว token จากการใช้ node-omise (ที่อ่าน secket key) และ Amount ของ source จะต้องเท่ากันกับตอนสร้าง charge
const createCharge = (source, amount, orderId) => {
  return new Promise((resolve, reject) => {
    omise.charges.create({
      amount: (amount * 100),
      currency: 'THB',
      return_uri: `http://localhost:5173/success?order_id=${orderId}`,
      metadata: {
        orderId
      },
      source,
    }, (err, resp) => {
      if (err) {
        return reject(err)
      }
      resolve(resp)
    })
  })
}

app.post('/placeorder', async (req, res) => {
  try {
    const idToken = req.headers.authorization
    const checkoutData = req.body.checkout
    let userUid = ''
    if (idToken) {
      const decodedToken = await auth.verifyIdToken(idToken)
      userUid = decodedToken.uid
    }

    // summary data
    let summaryPrice = 0
    let checkoutProducts = []
    let omiseResponse = {}

    // check stock, valid = decrease stock
    await db.runTransaction(async (transaction) => {
      for (const product of checkoutData.products) {
        const productRef = db.collection('products').doc(product.productId)
        const snapshot = await productRef.get()
        const productData = snapshot.data()
        const remainQuantity = productData.remainQuantity - product.quantity
        if (remainQuantity < 0) {
          throw new Error(`Product: ${productData.name} out of stock`)
        }
        summaryPrice += (productData.price * product.quantity)
        transaction.update(productRef, { remainQuantity })

        let checkoutProduct = product
        checkoutProduct.price = productData.price
        checkoutProduct.totalPrice = productData.price * product.quantity
        checkoutProduct.name = productData.name
        checkoutProduct.about = productData.about
        checkoutProduct.imageUrl = productData.imageUrl
        checkoutProducts.push(checkoutProduct)
      }

      const orderRef = db.collection('orders')

      // create order id
      const orderId = orderRef.doc().id

      // เพิ่มการเรียก omise charge เข้ามา
      omiseResponse = await createCharge(
        req.body.source,
        summaryPrice,
        orderId
      )

      // create order
      const orderData = {
        chargeId: omiseResponse.id, // นำ charge id ไปเก็บใน order
        email: checkoutData.email,
        name: checkoutData.name,
        address: checkoutData.address,
        note: checkoutData.note || '',
        totalPrice: summaryPrice,
        paymentMethod: 'rabbit_linepay',
        createdAt: new Date(),
        products: checkoutProducts,
        status: 'pending',
        orderId,
        userUid
      }

      transaction.set(orderRef.doc(orderId), orderData)
    })

    res.json({
      message: 'Order successful!',
      redirectUrl: omiseResponse.authorize_uri // ทำการ return payment gateway url ออกไปแทน (จาก omise Response)
    })
  } catch (error) {
    console.log('error', error)
    res.status(500).json({
      message: error.message
    })
  }
})
เพียงเท่านี้ เมื่อเราลองทำการยิง placeorder อีกทีก็จะสามารถนำพาไปยัง payment gateway ได้