มาลองทำ Upload file แต่ละเคสกัน
/ 6 min read
 สามารถดู video ของหัวข้อนี้ก่อนได้ ดู video
Upload คืออะไร ?
Upload คือการนำไฟล์จากเครื่องต้นทาง ส่งไฟล์ไปยังเครื่องปลายทาง ซึ่งเครื่องปลายทางจะเป็นอะไรก็ได้ เช่น
- เครื่อง server เครื่องนั้น
- Cloud server
เคสที่เราจะมาลองทำกัน
upload ลงเครื่องเราเอง (จากเครื่องเราเอง) โดยเราจะมีการแยกตาม topic ต่างๆไปตั้งแต่
- upload แบบปกติ
- ทำ progress upload
- validate file หรือขนาดที่ต้องการ
- cancel upload
Structure
├── index.js --> สำหรับ node (ที่ทำ API upload ไฟล์)├── package.json├── src│ └── index.html --> สำหรับฝั่ง Frontend หน้าบ้านทำหน้า uploadโดย package.json จะมี package เป็นตามนี้
{ "name": "upload-basic", "version": "1.0.0", "description": "", "main": "index.js", "scripts": { "start": "python3 -m http.server --directory src 8888", "test": "echo \"Error: no test specified\" && exit 1" }, "author": "", "license": "ISC", "dependencies": { "cors": "^2.8.5", "express": "^4.18.2", "multer": "^1.4.5-lts.1", "nodemon": "^3.0.1" }}โดย package ที่เราจะลงจะประกอบด้วย
expressสำหรับทำ APIcorsสำหรับเปิด Cross origin ให้สามารถยิง API ผ่าน Frontend ได้multerสำหรับ upload file เข้าเครื่อง
จริงๆ Express มีการแนะนำเรื่องการใช้ multer upload อยู่แล้วที่นี่ https://expressjs.com/en/resources/middleware/multer.html
เริ่มทำ API Upload และ upload แบบปกติ
สิ่งที่เราจะทำ
- เพิ่ม API สำหรับการ upload file เข้ามา (โดยลง multer ไป)
- (ฝั่ง Frontend) upload file ผ่าน form data เข้าไปผ่าน axios
ใช้ Form data เพราะเป็น Web API ที่ support ทั้ง Browser (ส่งไฟล์) และ Server (รับไฟล์) รวมถึง support การส่งหลายไฟล์ด้วย
ที่ Backend index.js
const express = require('express')const multer = require('multer')const cors = require('cors')
const storage = multer.diskStorage({  destination: function (req, file, cb) {      cb(null, './uploads/')  },  filename: function (req, file, cb) {    const fileName = `${Date.now()}-${file.originalname}`    cb(null, fileName)  }})
const upload = multer({  storage: storage})
const app = express()app.use(cors())
const port = 3000
// test คือชื่อ field ที่เราส่ง upload มาapp.post('/upload', upload.single('test'), (req, res) => {  res.send(req.file)})
app.listen(port, () => {  console.log(`Server started on http://localhost:${port}`)})
ที่ Frontend src/index.html
<!DOCTYPE html><html lang="en">  <head>    <meta charset="UTF-8" />    <meta name="viewport" content="width=device-width, initial-scale=1.0" />    <title>File Upload</title>    <script src="https://cdn.jsdelivr.net/npm/axios/dist/axios.min.js"></script>  </head>  <body>    <input type="file" id="fileInput" />    <button onclick="uploadFile()">Upload</button>
    <script>      const uploadFile = async () => {        const fileInput = document.getElementById('fileInput')
        if (!fileInput.files.length) {          return alert('Please choose a file to upload')        }
        const formData = new FormData()        formData.append('test', fileInput.files[0])
        try {          const response = await axios            .post('http://localhost:3000/upload', formData, {              headers: {                'Content-Type': 'multipart/form-data',              },            })        } catch (error) {          console.log('error', error)          alert('Error uploading file')        }      }    </script>  </body></html>
ทำ progress การ upload
- ตัว multer ได้มีการทำเรื่องการส่ง progress มาอยู่แล้ว = ฝั่ง Backend ไม่ต้องปรับอะไร
- ฝั่ง Frontend ใช้
onUploadProgressของaxiosในการแสดง progress ได้เลย
<body>    <input type="file" id="fileInput" />    <button onclick="uploadFile()">Upload</button>
    <!-- เพิ่ม code progress bar มา-->
    <div>      <progress id="uploadProgress" value="0" max="100" style="width: 100%"></progress>      <span id="uploadPercentage">0%</span>    </div>
    <script>      const uploadFile = async () => {        const fileInput = document.getElementById('fileInput')        // เพิ่ม 2 อันนี้เข้ามา        const progressBar = document.getElementById('uploadProgress')        const uploadPercentageDisplay = document.getElementById('uploadPercentage')
        try {          const response = await axios            .post('http://localhost:3000/upload', formData, {              headers: {                'Content-Type': 'multipart/form-data',              },              onUploadProgress: function(progressEvent) {                // เพิ่ม update progress กลับเข้า UI ไป                const percentCompleted = Math.round((progressEvent.loaded * 100) / progressEvent.total)                progressBar.value = percentCompleted                uploadPercentageDisplay.innerText = `${percentCompleted}%`              },            })        } catch (error) {          console.log('error', error)          alert('Error uploading file')        }      }    </script></body>
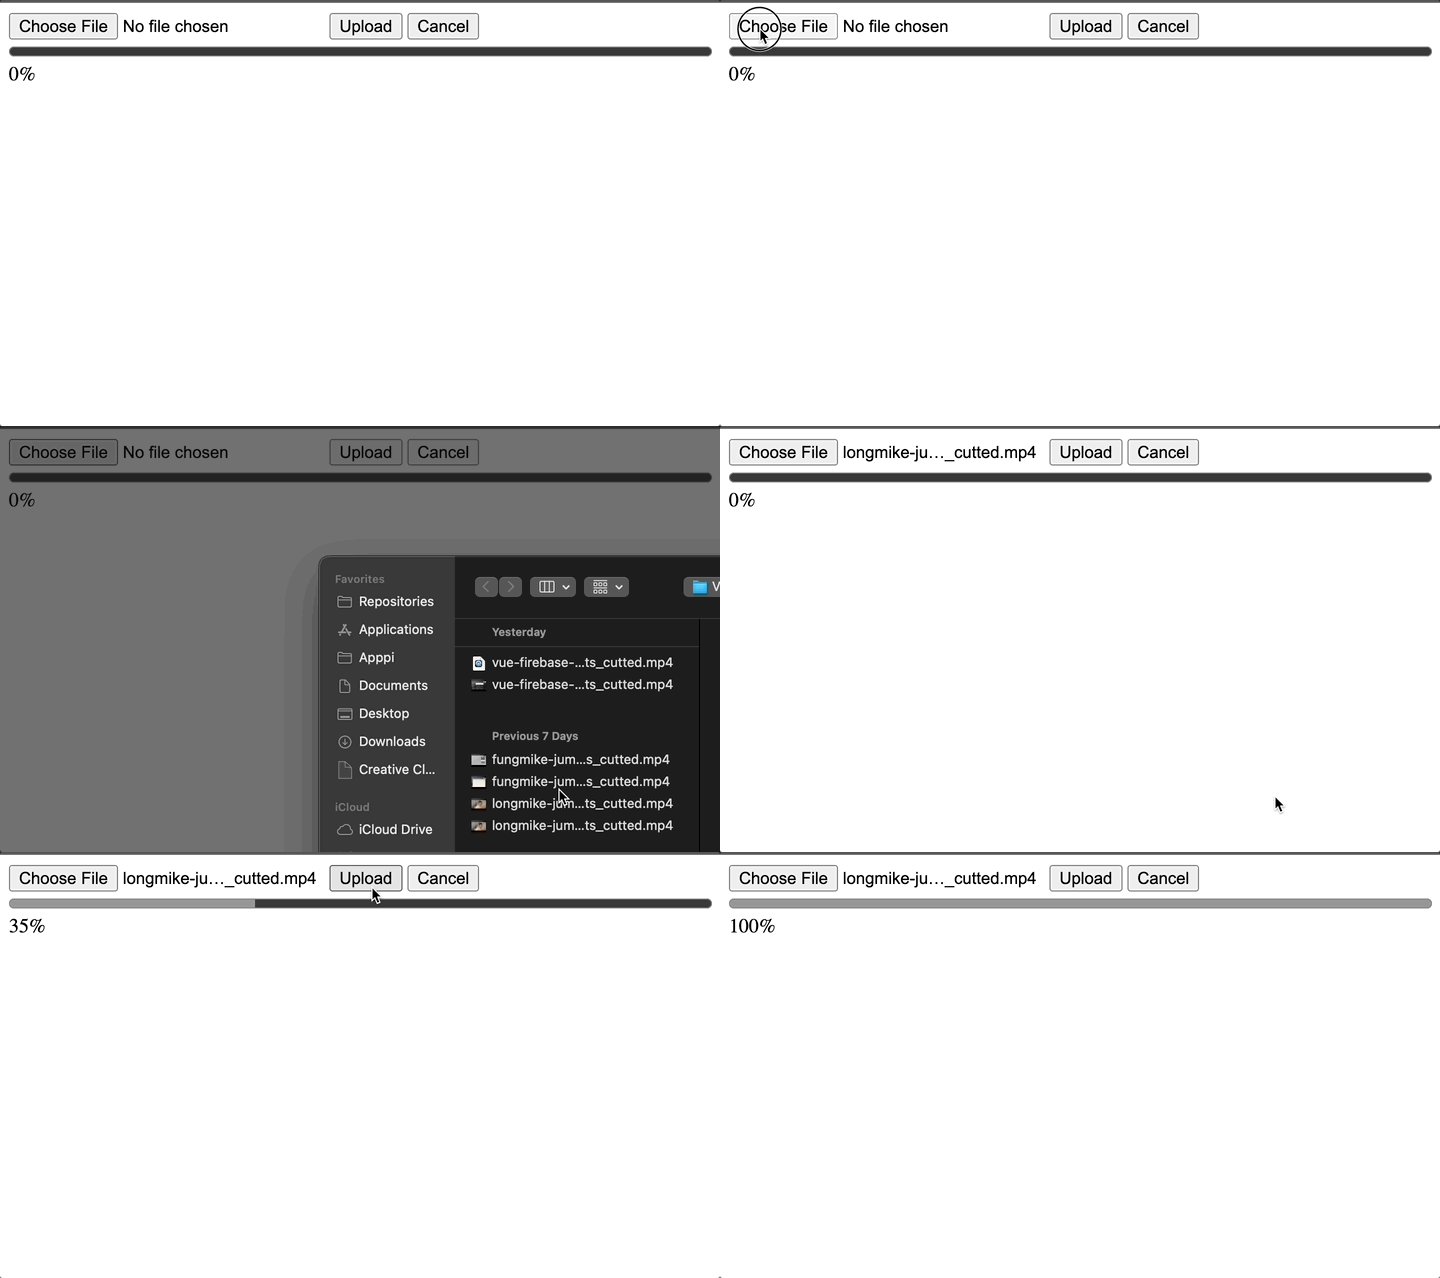
ผลลัพธ์จะได้ออกมาเป็นประมาณนี้

validate file เฉพาะ ไฟล์ที่ต้องการ
ดัก file type
สมมุติเราต้องการไฟล์แค่ file type mp4 เท่านั้น ปกติ สามารถดักได้ 2 ทาง
- ดักจาก Frontend = ก่อนส่งไปยัง API upload เช็คก่อนว่า file type ถูกหรือไม่ ?
- ดักจาก Backend = ก่อน upload จริง เช็คก่อนว่า file type ถูกหรือไม่ ?
ท่าดักจาก frontend
<script>  const uploadFile = async () => {    const fileInput = document.getElementById('fileInput')    const progressBar = document.getElementById('uploadProgress')    const uploadPercentageDisplay = document.getElementById('uploadPercentage')
    if (!fileInput.files.length) {      return alert('Please choose a file to upload')    }
    // เพิ่ม validate มา    if (fileInput.files[0].type !== 'video/mp4') {      return alert('Please select correct file type')    }
    try {      const response = await axios        .post('http://localhost:3000/upload', formData, {          headers: {            'Content-Type': 'multipart/form-data',          },          onUploadProgress: function(progressEvent) {              const percentCompleted = Math.round((progressEvent.loaded * 100) / progressEvent.total)              progressBar.value = percentCompleted              uploadPercentageDisplay.innerText = `${percentCompleted}%`          },          cancelToken: source.token,        })    } catch (error) {      console.log('error', error)      alert('Error uploading file')    }  }</script>
ท่าดักจาก backend
- เพิ่ม fileFilter เข้า multer เข้าไปเพื่อเป็นตัวกั้นก่อน
- ย้าย upload.single จากเป็น middleware ให้มาเรียกเป็น function แทน เพื่อให้สามารถ handle error เป็น json ออกมาได้ (จัดการผ่าน callback)
const fileFilter = (req, file, cb) => {  if (file.mimetype === 'video/mp4') {    cb(null, true)  // Accept the file  } else {    cb(new Error('Only .mp4 files are allowed!'), false) // Reject the file  }}
const upload = multer({  storage: storage,  fileFilter // เพิ่มเข้ามา})
app.post('/upload', (req, res) => {  // ย้ายมาไว้ใน function หลัก  upload.single('test')(req, res, (err) => {    if (err) {      console.log('error', err)      res.status(400).json({ message: 'upload fail', error: err.message })      // หลังจากใส่ response เสร็จให้ destroy request เพื่อบอกไปยังฝั่ง axios (เป็น workaround เนื่องจาก axios ไม่สามารถหยุด pending ได้จากการใช้ res.json())      return res.req.destroy()    }    res.send(req.file)  })})
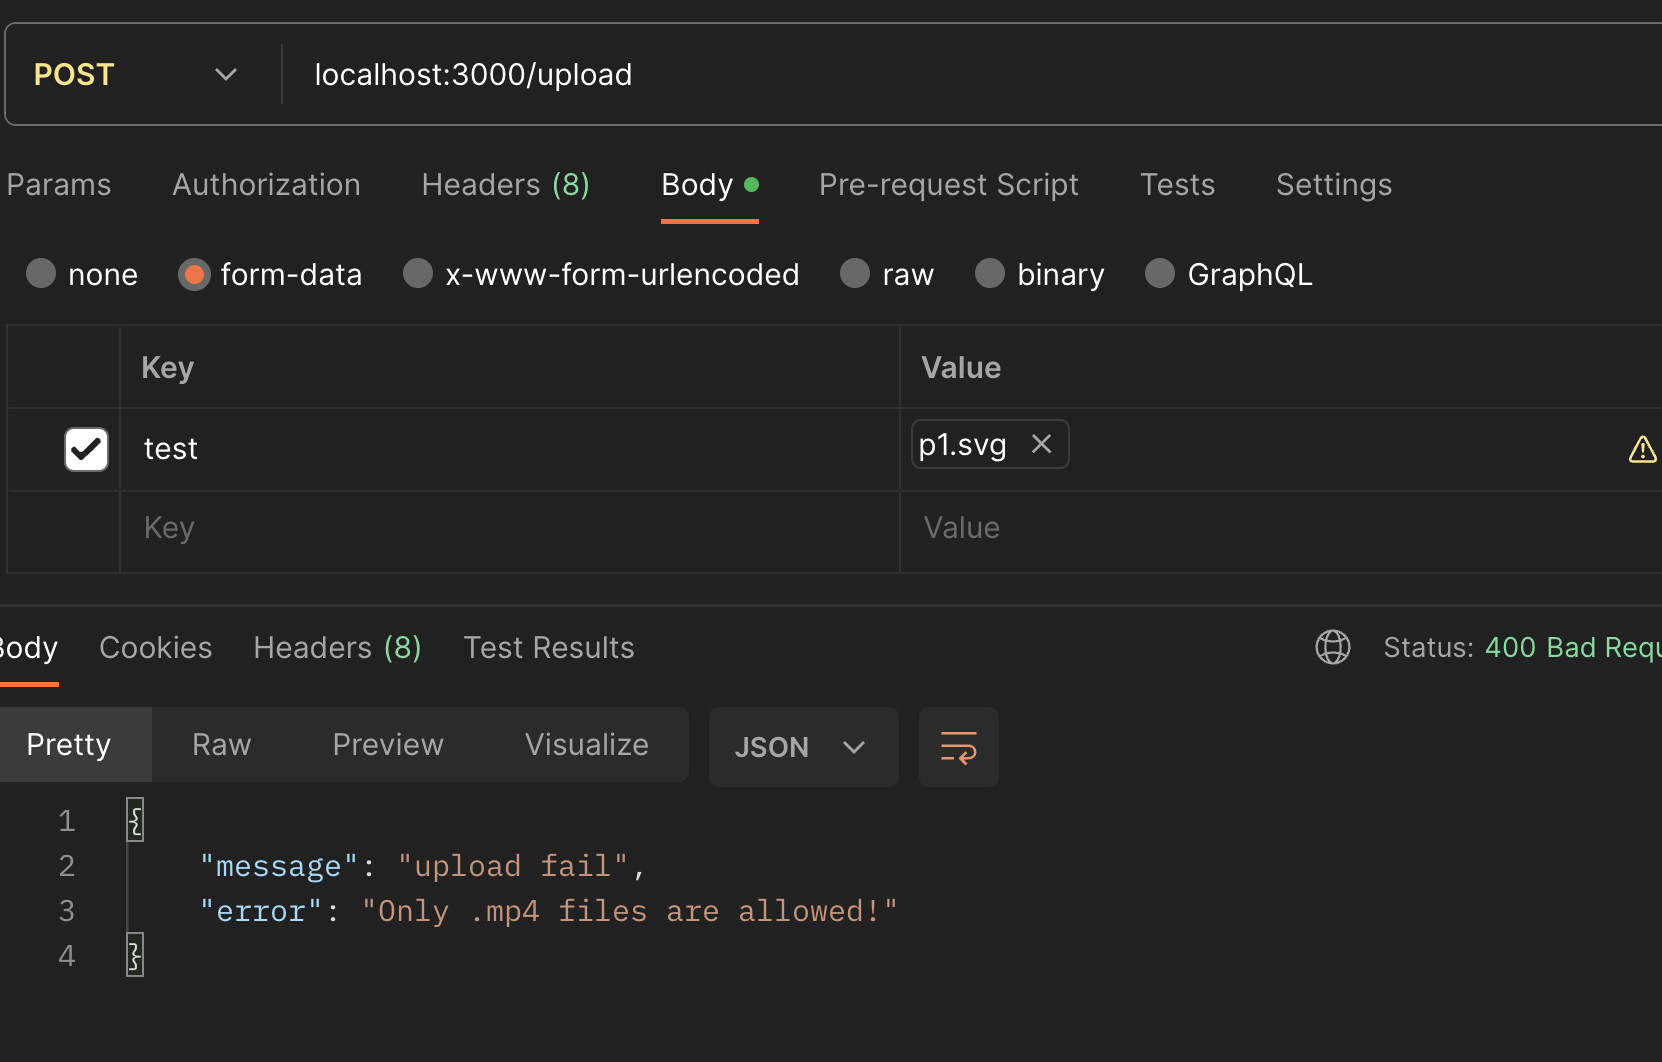
ผลลัพธ์ของเรื่องราวนี้

ดัก file size
- ดักจาก Frontend = เช็คขนาด size ก่อน (ในหน่วย byte) ถ้าขนาดเกิน = ไม่ยิง API upload
- ดักจาก Backend = ก่อน upload จริง เช็คก่อนว่า file size ถูกต้องหรือไม่
ท่าดักจาก Frontend
- เพิ่มการเช็คขนาด file ด้วย
fileInput.files[0].size(ไอเดียคล้ายๆเช็ค type)
<script>  const uploadFile = async () => {    const fileInput = document.getElementById('fileInput')    const progressBar = document.getElementById('uploadProgress')    const uploadPercentageDisplay = document.getElementById('uploadPercentage')
    if (!fileInput.files.length) {      return alert('Please choose a file to upload')    }
    // เพิ่ม validate filt size เข้ามา มา    if (fileInput.files[0].size < 2 * 1024 * 1024) {      return alert('Please upload file less than 2 MB')    }
    try {      const response = await axios        .post('http://localhost:3000/upload', formData, {          headers: {            'Content-Type': 'multipart/form-data',          },          onUploadProgress: function(progressEvent) {              const percentCompleted = Math.round((progressEvent.loaded * 100) / progressEvent.total)              progressBar.value = percentCompleted              uploadPercentageDisplay.innerText = `${percentCompleted}%`          },          cancelToken: source.token,        })    } catch (error) {      console.log('error', error)      alert('Error uploading file')    }  }</script>
ท่าดักจาก Backend
- เพิ่มการเช็คขนาดด้วย limit (option ของ multer) สามารถทำได้เลย
const upload = multer({ storage: storage, limits: { // เพิ่ม limits เข้ามาใน multer fileSize: 2 * 1024 * 1024 // 2 MB }, fileFilter})cancel การ upload
เมื่อมีการปิด browser ระหว่างกลางหรือมีการกด cancel = ควรจะลบไฟล์ออก (แปลว่า Request นั้นโดน reject ทิ้ง)
- ฝั่ง Frontend ต้องทำการตัด Request API ทิ้งเมื่อมีการ cancel
- ฝั่ง Backend ต้องทำการจัดการ file ทิ้งเมื่อเจอว่า Request โดน reject ระหว่างทาง (abort)
ฝั่ง Frontend
<body>  <button onclick="cancelUploadBtn()">Cancel</button>
  <script>    let currentSource
    /* shortcut code ส่วน validate และ select Upload form */
    const source = axios.CancelToken.source()    currentSource = source
    try {      const response = await axios        .post('http://localhost:3000/upload', formData, {          headers: {            'Content-Type': 'multipart/form-data',          },          onUploadProgress: function(progressEvent) {              const percentCompleted = Math.round((progressEvent.loaded * 100) / progressEvent.total)              progressBar.value = percentCompleted              uploadPercentageDisplay.innerText = `${percentCompleted}%`          },          cancelToken: source.token,        })    } catch (error) {      if (axios.isCancel(error)) {        console.log('Upload was cancelled')      } else {        alert('Error uploading file')      }    }
    const cancelUploadBtn = () => {      if (currentSource) {        alert('cancel !')        currentSource.cancel('User closed browser or navigated away')      }    }  </script></body>
ฝั่ง Backend เพิ่ม code ที่ req ตรง filename เพื่อให้สามารถดึง path มาลบภาพได้
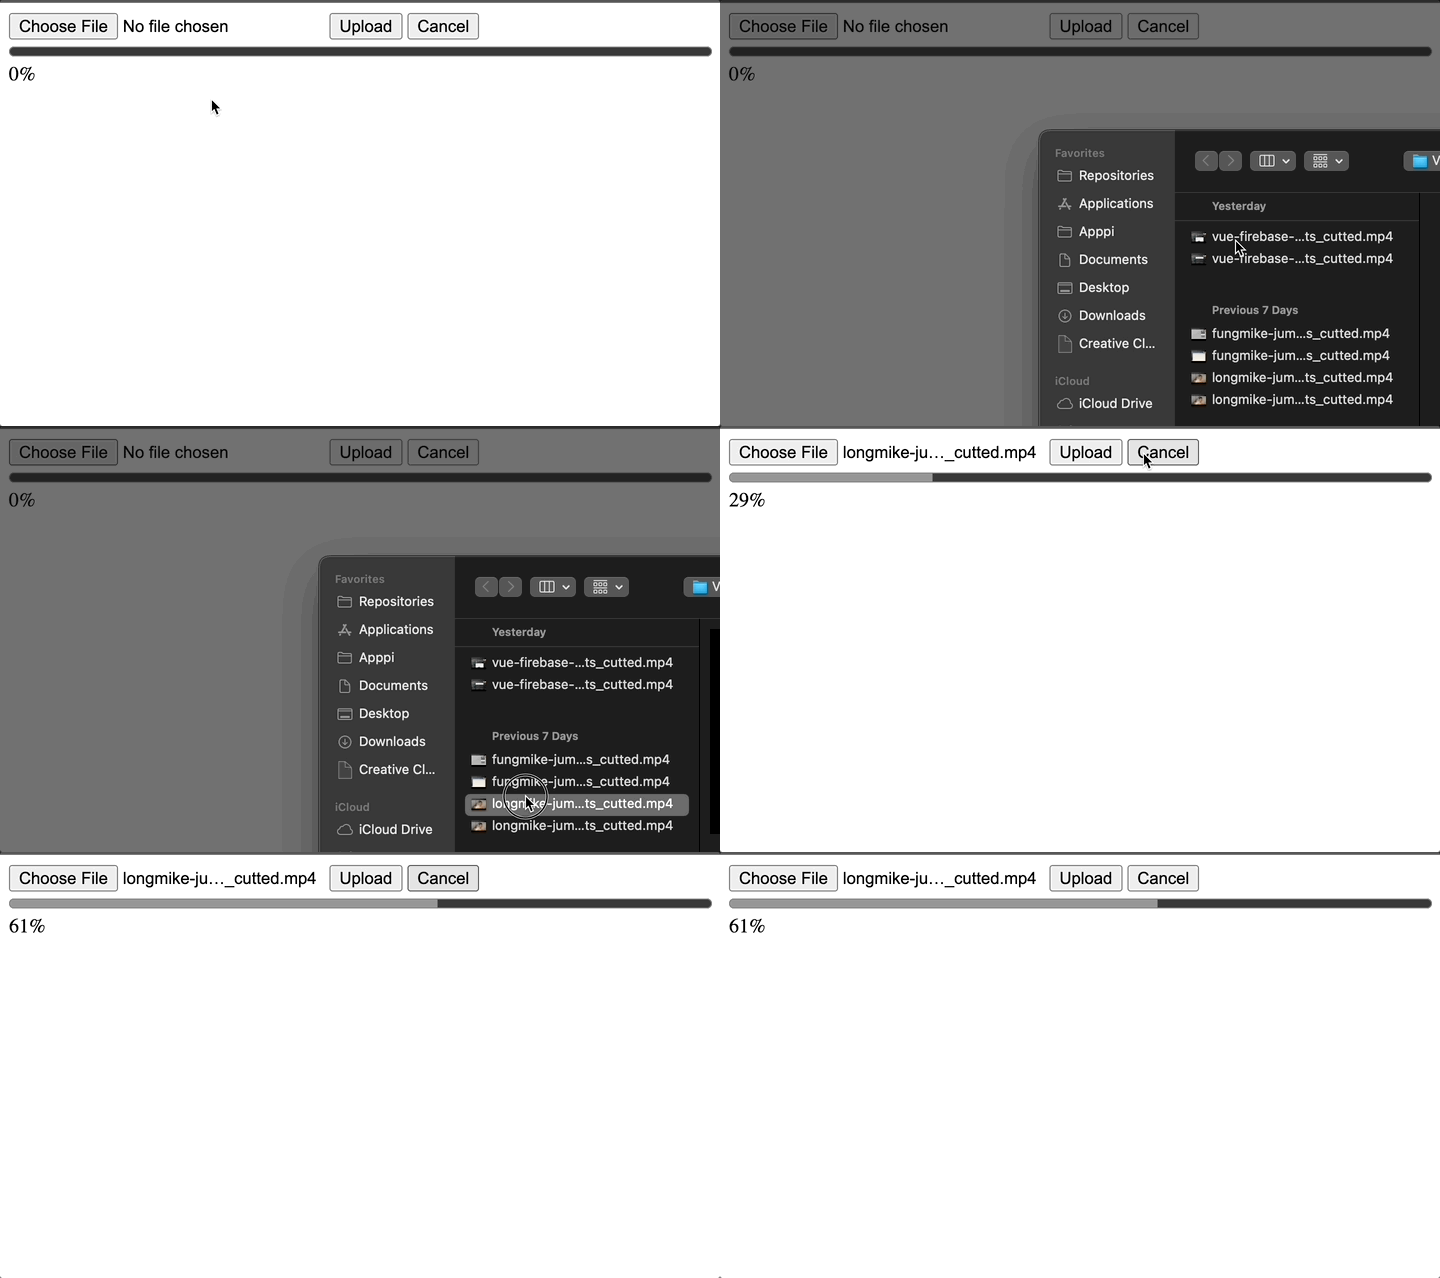
const storage = multer.diskStorage({ destination: function (req, file, cb) { cb(null, './uploads/') }, filename: function (req, file, cb) { const fileName = `${Date.now()}-${file.originalname}` cb(null, fileName) // request aborted = ลบไฟล์ req.on('aborted', () => { const fullPath = path.join('uploads', fileName) console.log('abort fullPath', fullPath) fs.unlinkSync(fullPath) }) }})ผลลัพธ์

อื่นๆ ที่ยังมีเกี่ยวกับ upload
- upload หลาย file ต้องปรับให้รับเป็น multiple แทน
ปรับ Frontend ให้รับแบบ multiple
<input type="file" id="fileInput" multiple />และฝั่ง Backend ให้รับเป็น array แทน
app.post('/upload', (req, res) => { upload.array('test', 5)(req, res, (err) => { if (err) { console.log('error', err) return res.status(400).json({ message: 'upload fail', error: err.message }) } res.send(req.file) })})- stream upload (หั่นค่อยๆ upload ไป) เดี๋ยวผมจะขอเก็บไว้เล่าเรื่องของ stream upload อีกที ผมอยากซาวเสียงนิดนึงว่าสนใจกันไหม หรือสนใจเรื่องอื่นกัน
- continue upload
- การ upload ผ่าน cloud (ผมจะเก็บไปแสดงวิธีทำในหัวข้อ Firebase cloud firestore ของ Vue firebase masterclass)
Github
https://github.com/mikelopster/upload-basic
- มาทำ Authentication ด้วย NestJS และ Passport กันมี Video
เรียนรู้การผสานพลังระหว่าง NestJS framework ยอดนิยมฝั่ง Node.js กับ Passport
- หาจุดซื้อขายในโลกของ Bot Trade เขาทำกันยังไง ?มี Video มี Github
เรื่องนี้สืบเรื่องจากที่ผมไปนั่งฟังเรื่องการทำ AI มา แล้วก็มีคนมาสอบถามผมประมาณว่า ทำ bot trade เนี้ยจริงๆเขาทำกันยังไง ผมก็คิดว่าก็ไม่น่ายากนะ
- รู้จักกับ Kafka distribution system สำหรับ Realtime กันมี Video มี Github
มาทำความรู้จัก Kafka กันว่า Kafka มันคืออะไร ใช้ทำอะไรบ้าง มี use case แบบไหน และลองมาละเลงผ่าน code กัน
- ลอง Rust Basic (2)มี Video
มาทำความรู้จักกับภาษา Rust กันต่อ พาเจาะลึก Concept ที่จะช่วยทำให้เราสามารถนำไปพัฒนา application ที่มีความยืดหยุ่นได้มากขึ้น


