

มาทำ Authentication ด้วย NestJS และ Passport กัน
/ 15 min read
 สามารถดู video ของหัวข้อนี้ก่อนได้ ดู video
แนะนำ NestJS และ Passport
หัวข้อนี้เราจะมาพูดถึงการทำ Authentication กันบ้าง Authentication หรือการยืนยันตัวตน คือกระบวนการตรวจสอบเพื่อพิสูจน์ว่าผู้ใช้เป็นตัวจริงตามที่อ้างถึง ก่อนที่จะอนุญาตให้เข้าใช้งานระบบหรือทรัพยากรต่างๆ ได้ โดย NestJS นั้นได้มี library ตัวช่วยอย่าง Passport ในการช่วยทำสิ่งนี้ให้ง่ายขึ้น
Passport Authentication ใน NestJS คือการใช้ Passport.js ซึ่งเป็น authentication middleware สำหรับ Node.js มาทำระบบ authentication ใน NestJS framework
Passport มีความยืดหยุ่นและเป็น Module ที่สามารถนำมาใช้งานได้ง่ายใน web application ที่สร้างด้วย Express หรือ NestJS โดยมี strategy ที่หลากหลายรองรับการ authentication ไม่ว่าจะเป็นด้วย username/password, OAuth ของ Facebook, Google เป็นต้น
เราจะทำอะไรกันบ้าง
ในหัวข้อนี้จะเป็นหัวข้อต่อเนื่องจาก NestJS ในหัวข้อก่อนหน้า โดยเราจะมาทำ login ทั้งหมด 3 แบบคือ
-
Login และยืนยันตัวตนผ่าน Access Token ด้วย Bearer Authentication
-
Login และ ยืนยันตัวผ่าน cookie
-
Login และ ยืนยันตัวตนด้วยวิธี Google Signin
โดยในหัวข้อนี้เราจะมาประยุกต์ใช้กับ MongoDB เป็น database ในการเก็บ account เอาไว้ (ผ่าน Mongoose) เราจะมาลองดูในแต่ละเคสกัน
ลง Passport และ setup project NestJS
เริ่มต้นเราจะ init project ด้วย NestJS กัน (แบบเดียวกันกับบทความก่อนหน้านี้ https://mikelopster.dev/posts/nestjs-mongo/)
nest new my-nest-auth-appเมื่อทำการ start เรียบร้อย ให้ทำการลง package เพิ่ม set สำหรับ 2 อย่างคือ
passportสำหรับเรื่อง Authenticationmongooseสำหรับจัดการ database MongoDB@nestjs/configสำหรับดึง env มาใช้งาน
npm install --save @nestjs/passport passport passport-local mongoose @nestjs/mongoose @nestjs/confignpm install --save-dev @types/passport-localเมื่อทำการลงเรียบร้อยให้เข้ามาใน project และทำการสร้าง resource 2 ตัวขึ้นมา
nest g resource authnest g resource userหลังจากสร้าง resource มาแล้วจะได้ structure ตามนี้ โดย
authจะเป็น module สำหรับการทำ Authentication โดยเฉพาะ เช่น Login, JWT Token, เช็คสิทธิ์userจะเป็น module สำหรับการจัดการ user เช่น Register, Get Profile (หลังจาก Login เรียบร้อย)
├── src ├── app.controller.spec.ts ├── app.controller.ts ├── app.module.ts ├── app.service.ts ├── auth │ ├── auth.controller.ts │ ├── auth.module.ts │ ├── auth.service.ts │ ├── local-auth.guard.ts │ └── strategies │ ├── jwt.strategy.ts │ └── local.strategy.ts ├── main.ts └── user ├── dto │ └── register.dto.ts ├── schemas │ └── user.schema.ts ├── user.controller.ts ├── user.module.ts └── user.service.tsก่อนที่เราจะเริ่มทำกัน เราจะติดตั้ง mongodb และ config ทุกอย่างให้พร้อมก่อนจะเริ่มต้นกัน
เพิ่ม .env และลง Mongoose
อย่างแรกสุดให้ start MongoDB ขึ้นมาโดยใช้ docker ตัวนี้
version: '3.8'
services:  mongo:    image: mongo    restart: always    environment:      MONGO_INITDB_ROOT_USERNAME: root      MONGO_INITDB_ROOT_PASSWORD: example    ports:      - "27017:27017"    volumes:      - mongo-data:/data/db
volumes:  mongo-data:    driver: local
ทำการ start mongo ด้วยคำสั่ง
docker-compose up -dหลังจาก start เรียบร้อยจะได้ mongodb ออกมาผ่าน docker ที่ port 27017

หลังจากนั้นให้ทำการต่อ NestJS เข้า mongodb ด้วย config เดียวกับ docker-compose.yml
import { Module } from '@nestjs/common';import { ConfigModule } from '@nestjs/config';
import { MongooseModule } from '@nestjs/mongoose';import { AppController } from './app.controller';import { AppService } from './app.service';import { AuthModule } from './auth/auth.module';import { UserModule } from './user/user.module';
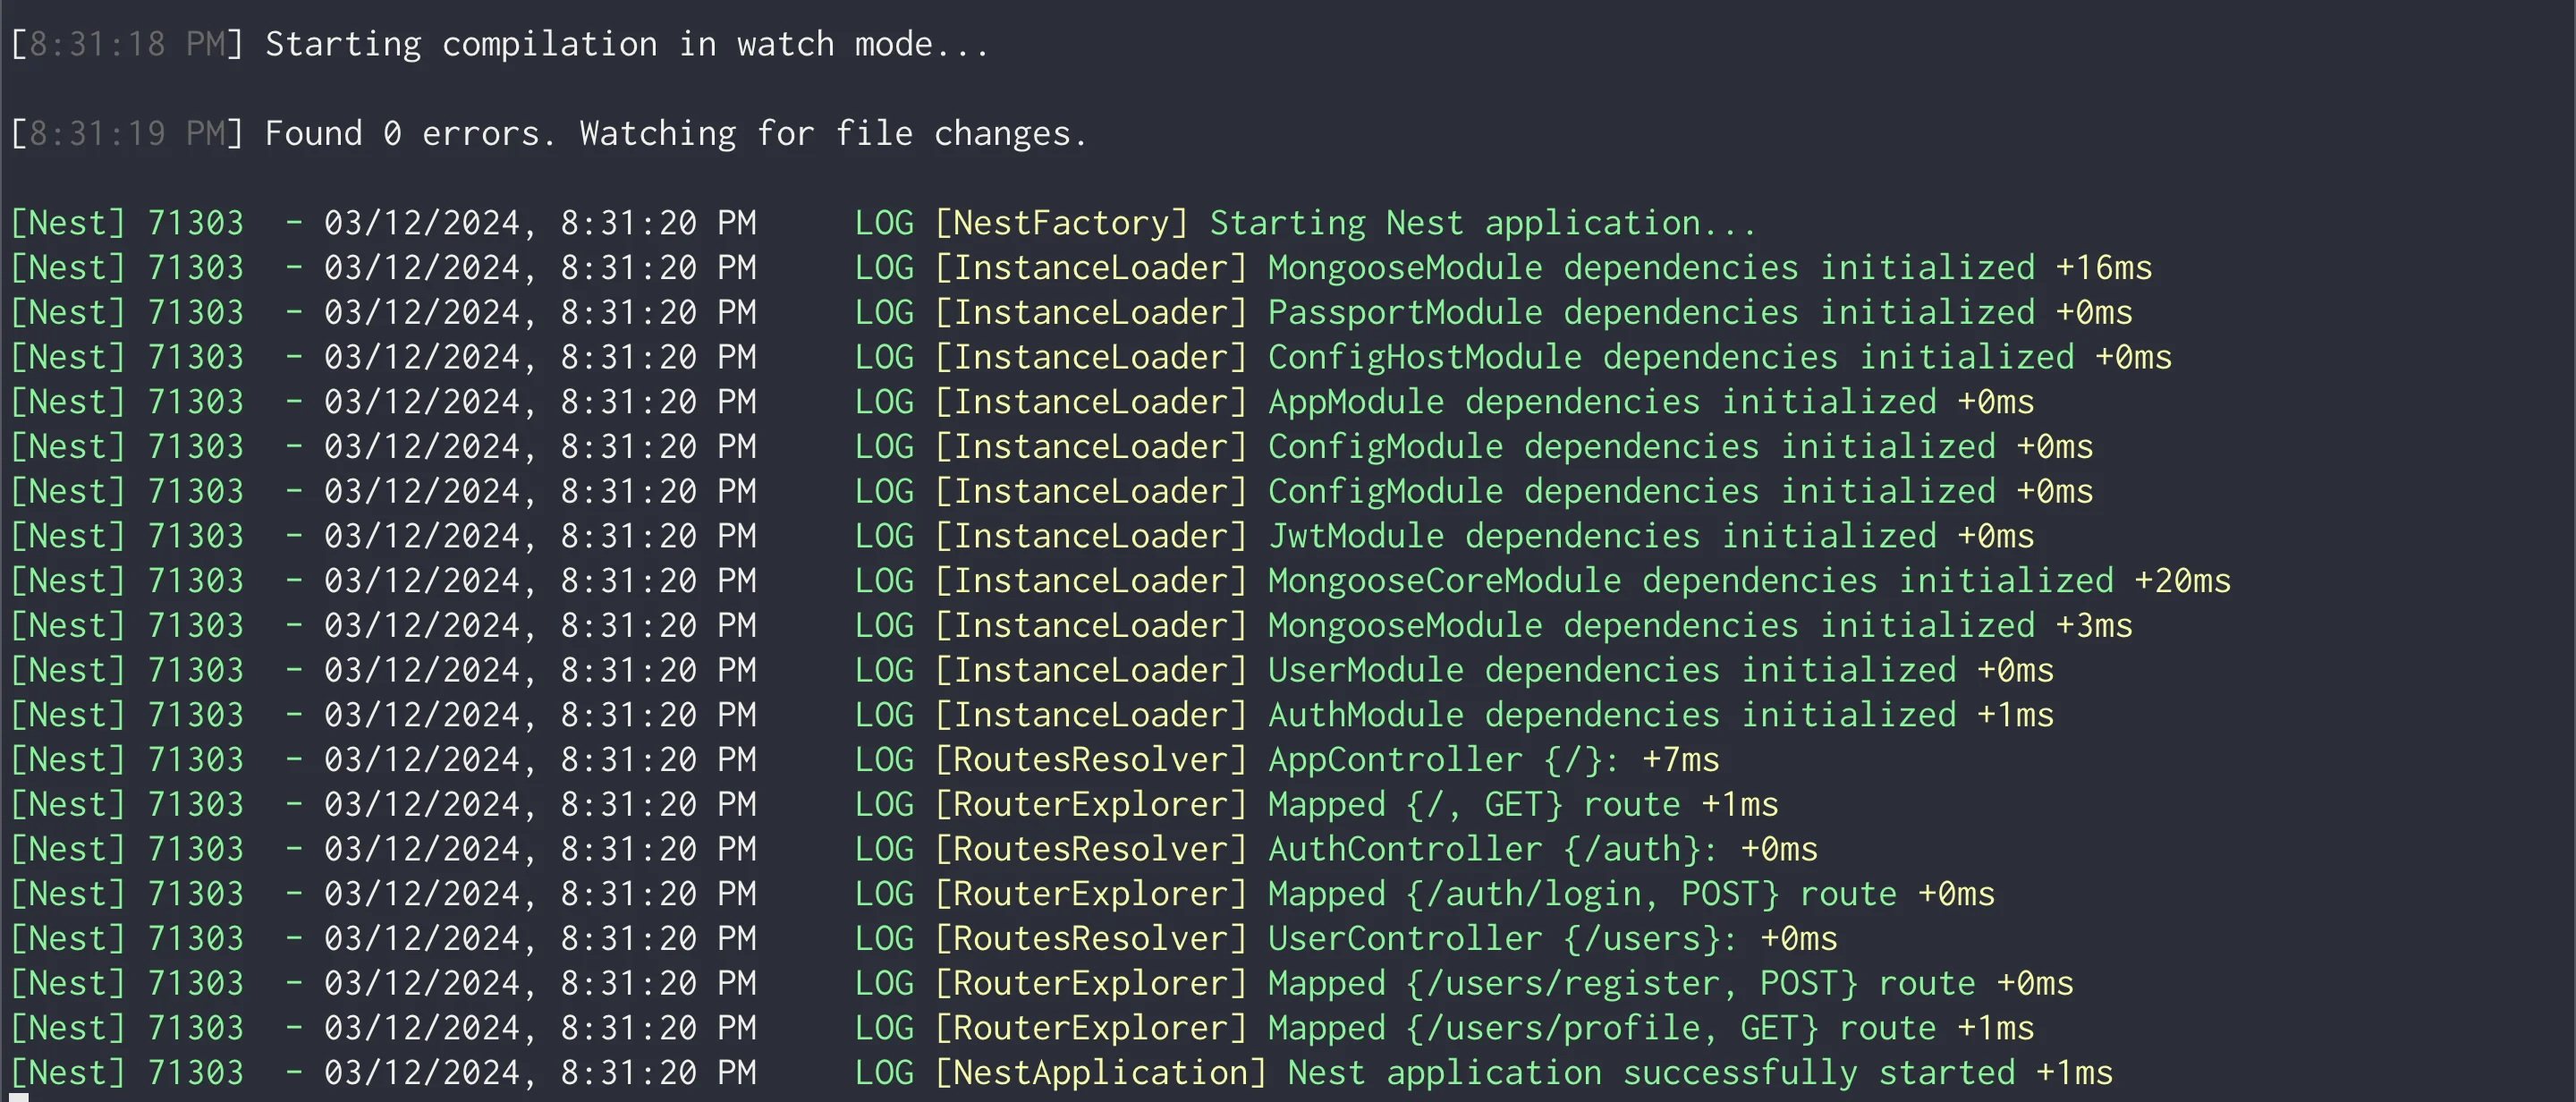
@Module({ imports: [ // เพิ่มไว้สำหรับการอ่าน config ผ่าน .env ConfigModule.forRoot({ isGlobal: true, envFilePath: '.env', }), // จะอ่านจาก dotenv หรือ fix code ก็ได้ (สำหรับตัวอย่างนี้) MongooseModule.forRoot(`mongodb://localhost:27017`, { user: 'root', pass: 'example', dbName: 'mikelopster', }), AuthModule, UserModule, ], controllers: [AppController], providers: [AppService],})export class AppModule {}จากนั้นให้ลอง start project ด้วย npm run start:dev หากสามารถ start project ได้ไม่มีปัญหาอะไร เท่ากับว่า project พร้อมสำหรับการพัฒนาเรียบร้อย
Login ด้วย JWT Strategy
มาสู่โจทย์แรกของเราคือ Login และยืนยันตัวตนผ่าน Access Token ด้วย Bearer Authentication กัน โดย concept ของการเพิ่ม Login เข้าไปคือ
- เราจะเพิ่ม API สำหรับการ Register เข้ามา (กำหนดให้ทำผ่าน POST
/users/register) โดยจะต้องส่ง email และ password เข้ามา (และ password จะต้องเข้า hash เรียบร้อย) - เพิ่ม API สำหรับการ Login เข้ามา (กำหนดให้ผ่าน POST
/auth/login) โดยทำการตรวจสอบก่อนว่า user และ password ตรงกันหรือไม่ และทำการคืนออกมาเป็น access token - เพิ่ม API สำหรับดึง profile (กำหนดผ่าน GET
/users/profile) ที่จะทำการแสดงข้อมูล user คนนั้นออกมาโดยเช็คจาก email ที่เก็บไว้ใน token โดยหาก token ถูกต้องและ user มีอยู่จริง = แสดงข้อมูล profile ออกมา
เราจะมาเริ่มจากโจทย์แรกกัน
เพิ่ม Register ก่อน
เริ่มจากโจทย์แรกสุด Register เราจะ focus กันที่ module ของ user ก่อน โดย step ในการทำคือ
- เพิ่ม user schema สำหรับเก็บข้อมูล user ใน MongoDB ขึ้นมา
- เพิ่ม service สำหรับ save ข้อมูล user เข้า MongoDB พร้อมกับตัวสำหรับการเข้า hash ของ password
- เพิ่ม API POST
/user/registerสำหรับรับ request user เข้ามาและ ส่งข้อมูล user เข้าไปใน service เพื่อ save เข้า database
file ที่เกี่ยวข้องจะมีตามนี้
├── src └── user ├── dto │ └── register.dto.ts ├── schemas │ └── user.schema.ts ├── user.controller.ts ├── user.module.ts └── user.service.tsเริ่มต้นจากสร้าง schema user ที่ user.schema.ts โดย
- ทำการเพิ่ม email, password เข้ามาสำหรับเป็น credential สำหรับ login
- name และ tel สำหรับเป็น personal information ที่เก็บข้อมูลไว้
UserSchema.pre('save')เป็นการเพิ่ม pre process เข้ามาก่อนที่จะ save เข้า database จริงๆ โดยสิ่งนี้เป็นการเพิ่มมาเพื่อทำการเข้า hash password ไว้ เพื่อไม่ให้เก็บ password ออกมาเป็น plain text และสามารถเพิ่ม logic เอาไว้ภายใน schema ได้
หน้าตา schema ก็จะออกมาประมาณนี้
import { Prop, Schema, SchemaFactory } from '@nestjs/mongoose';import { Document } from 'mongoose';import * as bcrypt from 'bcrypt';
export type UserDocument = User & Document;
@Schema()export class User {  @Prop({ required: true, unique: true })  email: string;
  @Prop({ required: true })  password: string;
  @Prop({ required: true })  name: string;
  @Prop()  tel: string;}
export const UserSchema = SchemaFactory.createForClass(User);
UserSchema.pre('save', async function (next) {  if (this.isModified('password')) {    this.password = await bcrypt.hash(this.password, 10);  }  next();});
ต่อมา เตรียมตัวสำหรับ request ที่จะส่งเข้ามาและ body ที่จะเป็นตัวแทนพูดคุยกันใน service โดยการสร้าง dto เป็นข้อตกลงสำหรับการพูดคุย ระหว่าง request ที่ส่งเข้ามา และ service ที่กำลังรับเข้าไป โดยเราจะรับทั้งหมด 4 fields คือ email, password, name และ tel เข้าไป (เหมือนกับ schema)
export class RegisterDTO { readonly email: string; readonly password: string; readonly name: string; readonly tel: string;}เริ่มต้นจาก Service ทำการสร้าง 2 function เอาไว้สำหรับ
create(registerDTO)สำหรับ สร้าง user เข้า user schema เข้าไป (สำหรับเก็บข้อมูล user เข้า database)findByEmail(email)สำหรับ ดึงข้อมูล user ตาม email (อันนี้ทำเพื่อไว้สำหรับกรณีที่ดึงผ่าน profile)
หน้าตา Service ก็จะมีหน้าตาประมาณนี้
import { Injectable } from '@nestjs/common';import { InjectModel } from '@nestjs/mongoose';import { Model } from 'mongoose';import { User, UserDocument } from './schemas/user.schema'; // Import UserDocument
import { RegisterDTO } from './dto/register.dto';
@Injectable()export class UserService {  constructor(    @InjectModel(User.name) private readonly userModel: Model<UserDocument>,  ) {} // Use UserDocument type
  async create(registerDTO: RegisterDTO): Promise<User> {    const newUser = new this.userModel(registerDTO);    return await newUser.save();  }
  // เตรียมไว้สำหรับหา user  async findByEmail(email: string): Promise<UserDocument> {    return await this.userModel.findOne({ email }).exec();  }}
หลังจากนั้นที่ Controller (สำหรับรับ request เข้ามาผ่าน Rest API) ทำการประกาศ API POST /users/register สำหรับรับ request เข้ามา โดย
- ให้ dto เป็นตัวกำหนด specs ของ request ที่ทำการส่งเข้ามา
- หลังจากได้ข้อมูลมาให้ส่งไปผ่าน user service เข้าไป ผ่าน function
create()ที่สร้างขึ้นมา
import {  Controller,  Post,  Body,  Get,  UseGuards,  Request,} from '@nestjs/common';import { UserService } from './user.service';import { RegisterDTO } from './dto/register.dto';
@Controller('users')export class UserController {  constructor(private readonly userService: UserService) {}
  @Post('register')  async register(@Body() registerDTO: RegisterDTO) {    return this.userService.create(registerDTO);  }}
และสุดท้ายนำทุกอย่างมามัดรวมกัน และทำการ register user schema เข้าไปใน mongoose
import { Module } from '@nestjs/common';import { MongooseModule } from '@nestjs/mongoose';import { User, UserSchema } from './schemas/user.schema';import { UserService } from './user.service';import { UserController } from './user.controller';
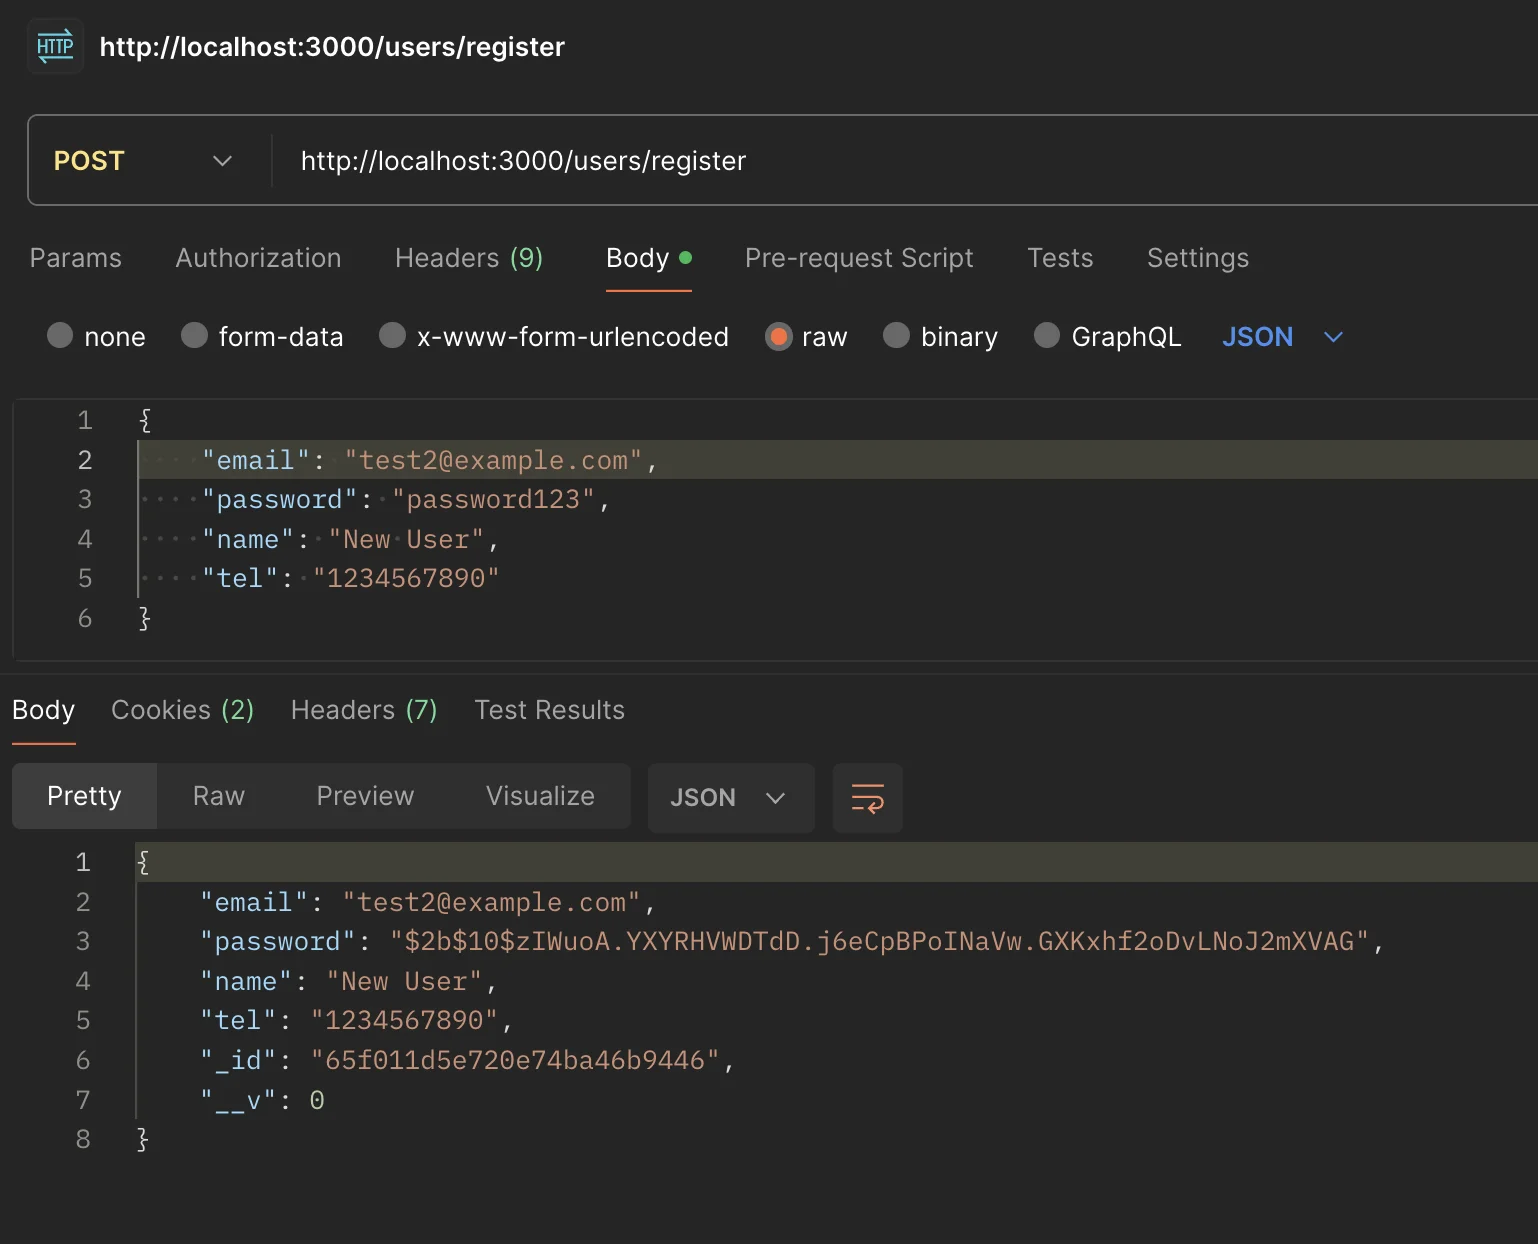
@Module({ imports: [ MongooseModule.forFeature([{ name: User.name, schema: UserSchema }]), ], providers: [UserService], controllers: [UserController], exports: [UserService, MongooseModule], // Export UserService for use in AuthModule})export class UserModule {}เมื่อลองทดสอบดูก็จะสามารถทำการ register เข้าไปได้ สังเกตว่าจะได้ password ที่เข้า hash ออกมาแล้วเรียบร้อย
เพิ่ม login
มาต่อกับที่ step login สิ่งที่เราจะทำกับ login คือ เราจะทำการสร้าง Strategy ของ Passport ขึ้นมา
Strategy ใน Passport.js หมายถึง วิธีการที่ใช้ในการยืนยันตัวตนของผู้ใช้งาน (Authentication Strategy) โดยมี Passport มี Strategy ต่างๆ ให้เลือกใช้ เช่น
- Local Strategy - ใช้สำหรับการยืนยันตัวตนด้วย username/password
- JWT Strategy - ใช้สำหรับการยืนยันตัวตนด้วย JSON Web Token
- OAuth Strategy - ใช้สำหรับการยืนยันตัวตนผ่าน OAuth providers อย่าง Google, Facebook เป็นต้น
เป็นต้น
ดังนั้นสำหรับการ login เราจะใช้ทั้งหมด 2 Strategy คือ
- ใช้ Local Strategy สำหรับการยืนยันตัวตนด้วย username/password
- ใช้ JWT Strategy สำหรับการยืนยันตัวตนด้วย JSON Web Token (ที่จะนำไปใช้ต่อกับดึง Profile)
file ที่เกี่ยวข้องก็จะเป็นไฟล์เหล่านี้
├── src ├── auth ├── auth.controller.ts ├── auth.module.ts ├── auth.service.ts ├── local-auth.guard.ts └── strategies ├── jwt.strategy.ts └── local.strategy.tsเริ่มต้น ทำการเพิ่ม Local Strategy สำหรับการเช็ค email และ password เข้ามา โดยการเพิ่มคำสั่ง validate เข้ามา
- function
validateเป็น function แบบ callback ที่ระบุเมื่อกำหนด strategy ของ Passport - function นี้มีหน้าที่ตรวจสอบข้อมูล request ที่ส่งเข้ามาผ่าน authentication และส่งคืน object ออกไปเมื่อถูกต้องแล้ว
- สิ่งนี้เป็น pattern ท่ามาตรฐานที่ passport.js เตรียมไว้ (จริงๆสามารถเปลี่ยนไปใช้ function อื่นได้ แต่หากใช้
validateจะสามารถใช้ default ในการ handle แต่ละส่วนได้เลย)
ดังนั้น โจทย์ของ local strategy คือ ใน function validate จะต้องตรวจสอบ email และ password ว่าถูกต้องหรือไม่ และหากถูกต้องสามารถส่ง object user ต่อไปยัง function ที่ทำการเรียกใช้ออกมาได้ (และทำการส่ง Error ออกมาหากข้อมูลตรวจสอบไม่ถูกต้อง)
import { Strategy } from 'passport-local';import { PassportStrategy } from '@nestjs/passport';import { Injectable, UnauthorizedException } from '@nestjs/common';import { AuthService } from '../auth.service';
@Injectable()export class LocalStrategy extends PassportStrategy(Strategy) {  constructor(private authService: AuthService) {    super({ usernameField: 'email' });  }
  async validate(email: string, password: string): Promise<any> {    const user = await this.authService.validateUser(email, password);    if (!user) {      throw new UnauthorizedException();    }    return user;  }}
ต่อมาที่ JWT Strategy จะเพิ่มเพื่อใช้สำหรับการ validate JWT โดย Strategy นี้สร้างมาสำหรับการ validate ในส่วนของการ Login
- โดยจะมีการ check Header ว่าเป็น JWT token ที่ถูก format หรือไม่
import { Injectable } from '@nestjs/common';import { PassportStrategy } from '@nestjs/passport';import { ExtractJwt, Strategy } from 'passport-jwt';import { ConfigService } from '@nestjs/config';
@Injectable()export class JwtStrategy extends PassportStrategy(Strategy) {  constructor(configService: ConfigService) {    super({      jwtFromRequest: ExtractJwt.fromAuthHeaderAsBearerToken(),      secretOrKey: configService.get('JWT_SECRET'), // Use the secret from environment variables      ignoreExpiration: false,    });  }
  async validate(payload: any) {    // This payload will be the decrypted token payload you provided when signing the token    return { userId: payload.sub, email: payload.email };  }}
หลังจากนั้นให้ทำการเพิ่ม local-auth.guade.ts เข้าไป เพื่อใช้สำหรับการเพิ่ม Guard ในการป้องกัน path เพื่อให้มีการ authentication ออกมาก่อนที่จะมีการเข้า Controller ใดๆก็ตามที่ผ่าน Guard ตัวนี้มา ส่งผลทำให้ ตัวใดก็ตามที่มีการวาง Guard ตัวนี้เอาไว้ = จะถูก authentication ด้วยวิธีที่ strategy นี้กำหนดไว้นั่นเอง
import { Injectable } from '@nestjs/common';import { AuthGuard } from '@nestjs/passport';
@Injectable()export class LocalAuthGuard extends AuthGuard('local') {}
หลังจากนั้นที่ Service ให้ทำการเพิ่ม function 2 ตัวเข้ามา
- validateUser(email, password) สำหรับการตรวจสอบว่า email และ password ถูกต้องหรือไม่ (ซึ่งมีการเรียกใช้ภายใน Local Strategy เพื่อทำการตรวจสอบว่า email ถูกต้องหรือไม่ )
- login(user) สำหรับ function การเข้า JWT token เมื่อ email และ password ผ่านแล้วเรียบร้อย
import { Injectable } from '@nestjs/common';import { JwtService } from '@nestjs/jwt';import { UserService } from '../user/user.service';import * as bcrypt from 'bcrypt';
@Injectable()export class AuthService {  constructor(    private userService: UserService,    private jwtService: JwtService,  ) {}
  async validateUser(email: string, pass: string): Promise<any> {    const user = await this.userService.findByEmail(email);    if (user && (await bcrypt.compare(pass, user.password))) {      const { password, ...result } = user.toObject();      return result;    }    return null;  }
  async login(user: any) {    const payload = { email: user.email, sub: user.userId };    return {      access_token: this.jwtService.sign(payload),    };  }}
เมื่อเรามาดูที่ฝั่งของ Controller กันบ้าง
- สังเกตุว่าเราจะมีการเรียกใช้ function this.authService.login(req.user) ตอนยิงเข้า POST
/loginเข้ามา - สังเกตว่า ก่อนที่จะยิงเข้ามา เราจะมีการผ่าน Guard มาก่อนหนึ่งชั้นนั่นคือ LocalAuthGuard เพื่อเป็นการตรวจสอบก่อนว่า email, password ที่ส่งมานั้นถูกต้องหรือไม่
- โดยถ้าข้อมูลส่งมาถูกต้อง request ที่ถึงตรงนี้ เป็นค่าที่ได้จาก function validate() ที่อยู่ใน local.strategy.ts (ที่เรียกใช้
this.authService.validateUserออกมา)
import { Controller, Post, UseGuards, Request } from '@nestjs/common';import { AuthService } from './auth.service';import { LocalAuthGuard } from './local-auth.guard';
@Controller('auth')export class AuthController {  constructor(private authService: AuthService) {}
  @UseGuards(LocalAuthGuard)  @Post('login')  async login(@Request() req) {    return this.authService.login(req.user);  }}
สุดท้ายที่ auth.module.ts เรียกใช้ทุกอย่างเข้าด้วยกันหมด เพื่อให้สามารถเรียกใช้หากันได้
import { Module } from '@nestjs/common';import { AuthService } from './auth.service';import { AuthController } from './auth.controller';import { UserModule } from '../user/user.module';import { PassportModule } from '@nestjs/passport';import { JwtModule } from '@nestjs/jwt';import { JwtStrategy } from './strategies/jwt.strategy';import { LocalStrategy } from './strategies/local.strategy';import { ConfigService, ConfigModule } from '@nestjs/config';
@Module({  imports: [    UserModule,    PassportModule,    JwtModule.registerAsync({      imports: [ConfigModule], // Import ConfigModule      useFactory: async (configService: ConfigService) => ({        secret: configService.get('JWT_SECRET'), // Use ConfigService to get the secret        signOptions: { expiresIn: '60m' },      }),      inject: [ConfigService], // Inject ConfigService    }),  ],  providers: [AuthService, JwtStrategy, LocalStrategy],  controllers: [AuthController],})export class AuthModule {}
สุดท้ายทำการเพิ่ม .env เข้าไปเพื่อกำหนด JWT_SECRET
JWT_SECRET=yourSecretKeyHereผลลัพธ์
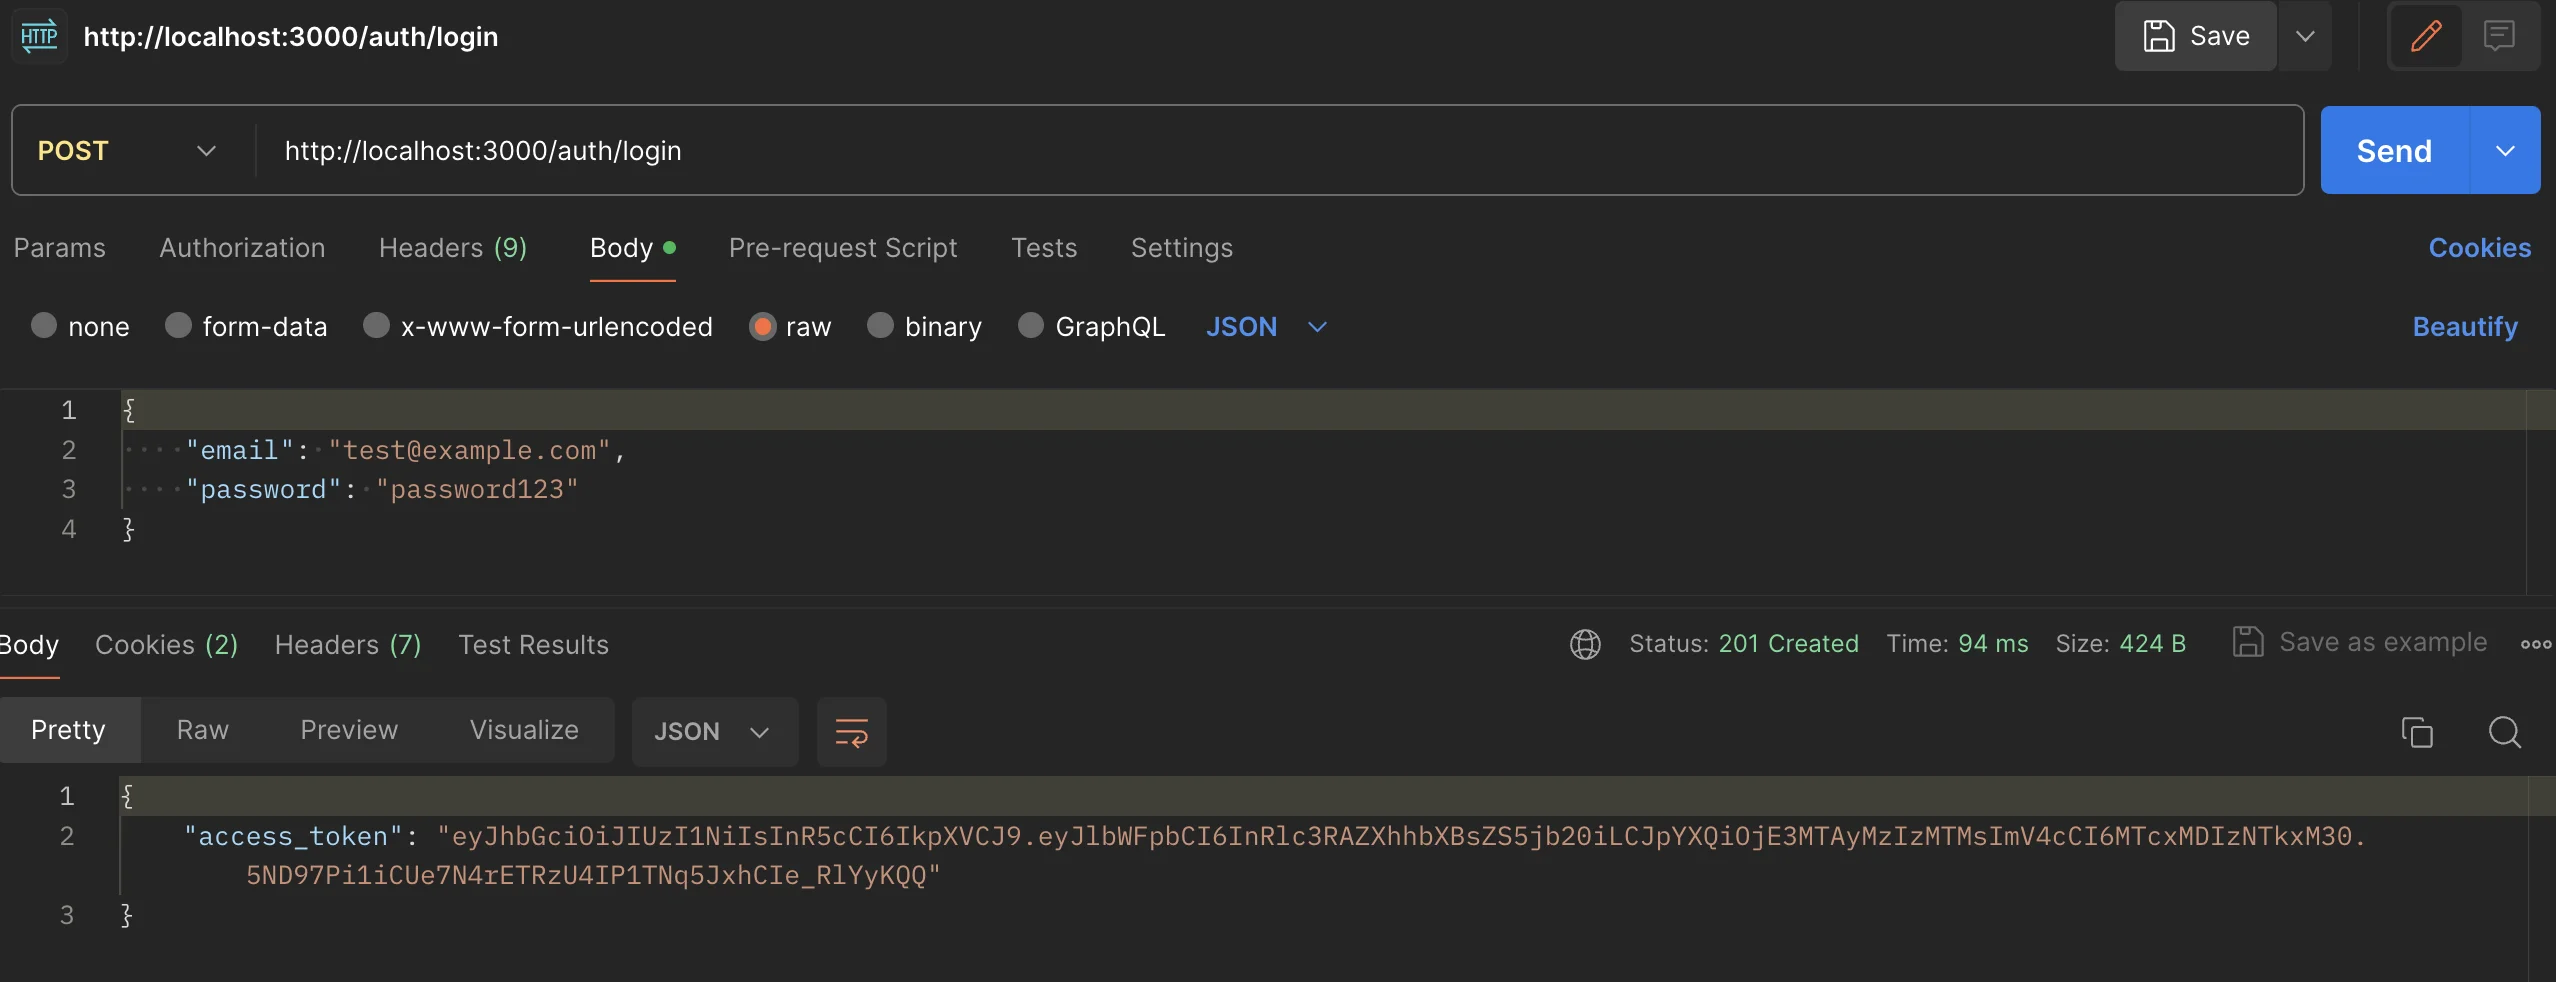
เพิ่ม Get Profile
ต่อมาเมื่อทำส่วน Login และได้ Access token มาเรียบร้อย เราจะเริ่มนำมาใช้กับส่วน Profile กัน โชคดีที่ว่า Passport.js นั้นได้มีการเตรียม AuthGuard เอาไว้สำหรับการ validate jwt ว่า jwt token ออกมาถูกต้อง (ตาม secret ที่กำหนดหรือไม่)
- จากหัวข้อก่อนหน้าเรามี
jwt.strategy.tsซึ่ง Strategy นี้เป็น Strategy ที่ทำการ register jwt เอาไว้ว่าจะทำการเข้ารหัสและตรวจสอบรหัสจาก Secret ใดเอาไว้ - สำหรับ get profile นั้นจะใช้ concept เหมือนกันคือการเพิ่ม Guard เอาไว้ (เหมือน local strategy) โดยใครที่ผ่าน Guard นี้นั้นจะต้องมี jwt ที่ validate อย่างถูกต้องก่อน จึงส่งผลลัพธ์ออกไปได้
- โดยสิ่งที่ทำได้คือ
validateที่อยู่ในjwt.strategy.ts(เหมือนกันกับ local strategy) โดยเมื่อมีการผ่าน validate ออกมาได้เรียบร้อย = ให้ส่งข้อมูลนี้ออกมาผ่าน request และใครที่นำไปใช้ต่อ ก็จะสามารถนำข้อมูลที่ส่งต่อจากvalidateไปใช้ต่อได้
หน้าตา code ก็จะออกมาเป็นประมาณนี้
import { /* import เหมือนเดิม */ } from '@nestjs/common';import { UserService } from './user.service';import { AuthGuard } from '@nestjs/passport';import { RegisterDTO } from './dto/register.dto';
@Controller('users')export class UserController {  constructor(private readonly userService: UserService) {}  // เพิ่มเข้ามา  @UseGuards(AuthGuard('jwt'))  @Get('profile')  getProfile(@Request() req) {    const user = this.userService.findByEmail(req.user.email);    return user;  }}
เมื่อลองดูผลลัพธ์สังเกตว่า
- หากไม่มี token ผ่าน header = แสดง Error ออกมาเป็น unauthorized ทันที
- แต่ถ้ามี token และ token ถูกต้อง (สามารถแกะออกมาได้ผ่าน
jwt.strategy.ts) = สามารถแสดงข้อมูลออกมาได้ โดยข้อมูล profile จะเป็นการค้นหาที่ได้จากผลลัพธ์ของthis.userService.findByEmail(req.user.email)ออกมา
เปลี่ยนมาใช้ cookie
ทีนี้ เราจะลองเพิ่มอีก 1 concept กัน โดย เราจะเปลี่ยนจากแต่เดิม token เราจะทำการเก็บเอาไว้ ให้ทำการเก็บผ่าน cookie แทน โดย concept คือ
- เราจะนำ access token ที่เคย return ได้ผ่าน login ออกมา ให้ save ลงไปยัง cookie
- จังหวะที่มีการดึง profile มาใช้ จากแต่เดิมที่ต้องส่งผ่าน header ให้อ่านผ่าน cookie ออกมาแทน
- ทุกอย่างเราจะเพิ่มผ่าน strategy และ middleware เพื่อไม่รบกวนส่วน code ของ controller แต่เดิม
ไฟล์ที่เกี่ยวข้องก็จะเป็นตามนี้
├── src ├── auth │ ├── auth.controller.ts │ └── strategies │ └── jwt.strategy.ts ├── main.tsstep แรกเพื่อให้ใช้งาน cookie ผ่านส่วนของ Backend ได้ให้ทำการลง cookie-parser เข้า project เข้าไป
npm install cookie-parserหลังจากนั้นที่ main.ts ให้ทำการเรียกใช้ cookie-parser เข้า project
import { NestFactory } from '@nestjs/core';import { AppModule } from './app.module';import * as cookieParser from 'cookie-parser';
async function bootstrap() {  const app = await NestFactory.create(AppModule);  // เพิ่ม cookie parser  app.use(cookieParser());  await app.listen(3000);}bootstrap();
ที่ jwt.strategy.ts ให้ทำการเพิ่มตัวรับ cookie มา โดย
- ทำการเพิ่ม option
jwtFromRequestมาเพิ่มเพื่อทำการดึง cookie ออกมาจาก request - ทำการดึง cookie ออกมาจาก key ที่ชื่อ
access_tokenว่ามีค่าหรือไม่ เพื่อนำส่งต่อไปใช้งานในJwtStrategyต่อ
// เพิ่มแค่ส่วนนี้เข้ามาimport { ExtractJwt, Strategy } from 'passport-jwt';
@Injectable()export class JwtStrategy extends PassportStrategy(Strategy) {  constructor(configService: ConfigService) {    super({      jwtFromRequest: ExtractJwt.fromExtractors([        (request: Request) => {          return request?.cookies?.access_token;        },      ]),    });  }
  // ที่เหลือเหมือนเดิม}
และที่ auth.controller.ts นั้น ให้เปลี่ยนจากแต่เดิมที่ return access token ออกมาตรงๆให้เปลี่ยนไป save access token เข้า cookie และ return เพียง Login Success ออกไปแทน
/* เหมือนเดิม */
@Controller('auth')export class AuthController {  constructor(private authService: AuthService) {}
  @UseGuards(LocalAuthGuard)  @Post('login')  async login(@Request() req, @Res({ passthrough: true }) res: Response) {    const { accessToken } = await this.authService.login(req.user);    res.cookie('access_token', accessToken, {      httpOnly: true,    });    return { message: 'Successfully logged in' };  }
  /* ที่เหลือเหมือนเดิม */}
และนี่คือผลลัพธ์ของเรื่องราวนี้ สังเกตว่า
- เราสามารถ login และ get profile ได้เหมือนเดิม แต่คราวนี้เราไม่จำเป็นต้องแนบผ่าน header แล้วเนื่องจาก save ผ่าน cookie แล้วเรียบร้อย
- ที่สำคัญคือ ไม่ต้องแก้ไขใดๆที่ user controller เนื่องจาก jwt guard ทำหน้าที่เป็น middleware คั่นกลางระหว่าง request ให้แล้วเป็นที่เรียบร้อย เราจึงสามารถแก้ไขได้จากการแก้ไขเพียงที่ jwt guard เท่านั้น
OAuth ด้วย Google Sign In
สุดท้าย เราจะลองเพิ่ม OAuth แบบ Social Sign in ด้วย Google กัน concept ของการเพิ่มคือ
- เราจะทำการสร้าง API Service ของ Google มาก่อน (อ่านเพิ่มเติมแบบละเอียดได้จาก หัวข้อ NextAuth)
- นำ key มาใส่ใน API และทำการเพิ่ม google strategy เข้า passport เข้ามา
- หลังจากนั้นเพิ่ม login และ callback url เพื่อเรียกใช้งานให้ถูกต้อง
- ท้ายที่สุด เพื่อให้ใช้กับ pattern jwt ตามเดิมทำให้ support กับ jwt token ตัวเดิม เพื่อให้สามารถยังคงเรียกใช้งานผ่าน profile ได้
เราจะมาเริ่มต้นสร้างที่ Google API Service กันก่อน
สร้าง Google API Service
(ในบทความนี้เราจะเขียนแบบย่อๆคร่าวๆเท่านั้นว่าเราจะ setting อย่างไร หากอยากอ่านละเอียด ให้อ่านเพิ่มเติมได้จากหัวข้อ NextAuth ก่อนหน้าได้)
ที่ Menu Credential ของ API Service ของ https://console.cloud.google.com/apis/credentials ให้ทำการสร้าง Credential ขึ้นมา โดยเลือก OAuth Client ID และเลือกเป็นฉบับ web ออกมา
- จากนั้นให้ตั้งชื่อและใส่ callback url ตามนี้
- ที่ application เดี๋ยวเราจะ implement callback url ตามนี้เพื่อรับการ redirect กลับมาจาก oauth ของ google
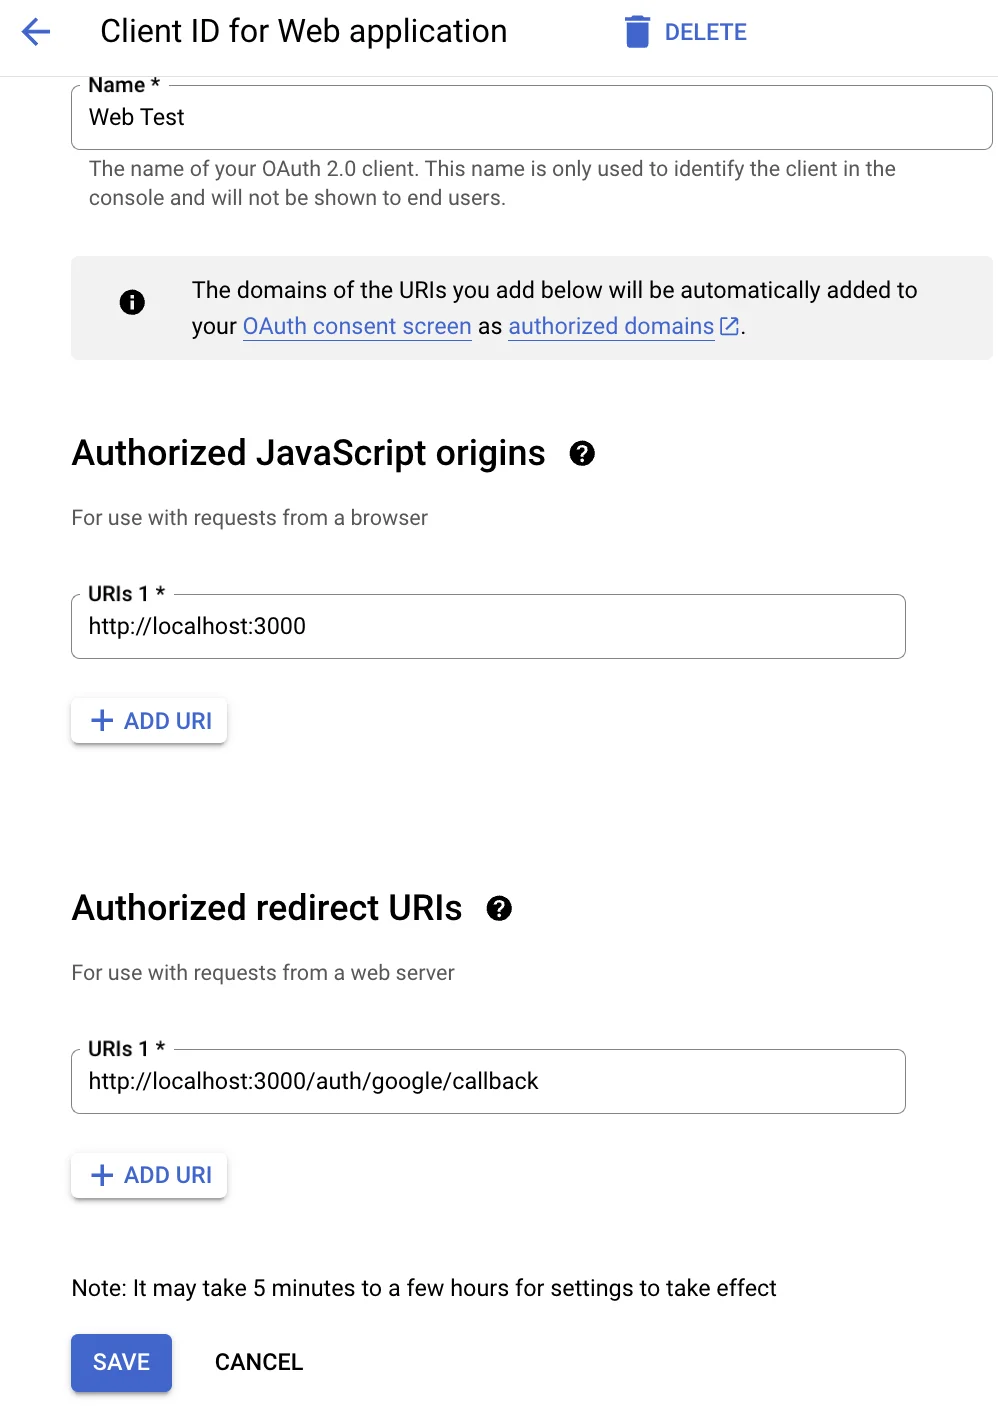
หลังจากสร้างเรียบร้อย เราจะได้ข้อมูล Client ID และ Client Secret ออกมา ให้นำ 2 ค่าที่ได้มาเพิ่ม .env เพื่อเตรียมใช้สำหรับการทำ oauth ของ google
GOOGLE_CLIENT_ID=xxxGOOGLE_CLIENT_SECRET=xxxxเมื่อสร้างและเพิ่มเรียบร้อย เราจะไปสู่ step ต่อไปกัน
เพิ่ม google sign in
Step แรกสุดเราจะทำการเพิ่ม library ที่ support Strategy ของ google-oauth20 ชื่อ passport-google-oauth20 ลงไปใน project
npm i passport-google-oauth20ไฟล์ที่เกี่ยวข้องรอบนี้จะมีตามนี้
├── src ├── auth │ ├── auth.controller.ts │ ├── auth.module.ts │ ├── auth.service.ts │ ├── google-auth.guard.ts │ └── strategies │ └── google.strategy.ts └── user ├── schemas └── user.schema.tsแรกสุดเพื่อให้ user schema นั้น support ทั้งการ login แบบ email password และ google login
- เราทำการปรับให้
passwordกลายเป็น optional - และทำการเพิ่ม
googleIdเข้ามาแทน เพื่อใช้สำหรับเก็บ identity ที่มาจาก google sign in
import { Prop, Schema, SchemaFactory } from '@nestjs/mongoose';import { Document } from 'mongoose';import * as bcrypt from 'bcrypt';
export type UserDocument = User & Document;
@Schema()export class User {  @Prop({ required: true, unique: true })  email: string;
  @Prop() // ปรับเป็น optional  password: string;
  @Prop({ required: true })  name: string;
  @Prop()  tel: string;
  @Prop() // เพิ่ม googleId เข้ามา  googleId: string;}
export const UserSchema = SchemaFactory.createForClass(User);
UserSchema.pre('save', async function (next) {  if (this.isModified('password')) {    this.password = await bcrypt.hash(this.password, 10);  }  next();});
หลังจากนั้นเพิ่ม google.strategy.ts เข้ามา โดย
- ที่
constructor()ทำการเพิ่ม setup strategy ของ Google เข้ามา (ตาม pattern ของ library ที่ passport เตรียมไว้) โดยทำการดึงค่าGOOGLE_CLIENT_IDและGOOGLE_CLIENT_SECRETจาก.envออกมา - ทำการ setup callback url ให้ถูกต้อง (เหมือนกับที่ setup ในหน้า google api console)
- เพิ่ม function
validate()เข้ามา (ตาม pattern ของ strategy) โดยสิ่งนี้จะเป็น callback ที่จะรับมาเมื่อกลับมาจาก oauth ของ google โดยตัว google นั้นจะทำการเตรียม data เข้ามาผ่าน callback ของvalidate()ส่งมายังตัวแปรแต่ละตัวเพื่อให้ไปใช้งานต่อได้ เช่นprofile= เป็นข้อมูล user,accessToken= access token จากฝั่ง google เป็นต้น - โดย
done(null, user)จะเป็น callback ที่มารับต่อจาก function ของ validate ไปอีกที สำหรับใครก็ตามที่เรียกใช้งาน Google Strategy นี้ - สุดท้ายทำการเพิ่ม
google-auth.guard.tsเพื่อเป็นตัวแทนสำหรับ Google Guard ที่เรียกใช้ภายใน Auth Module
import { PassportStrategy } from '@nestjs/passport';import { Strategy, VerifyCallback } from 'passport-google-oauth20';import { Injectable } from '@nestjs/common';import { ConfigService } from '@nestjs/config';
@Injectable()export class GoogleStrategy extends PassportStrategy(Strategy, 'google') {  constructor(private configService: ConfigService) {    super({      clientID: configService.get('GOOGLE_CLIENT_ID'),      clientSecret: configService.get('GOOGLE_CLIENT_SECRET'),      callbackURL: 'http://localhost:3000/auth/google/callback',      scope: ['email', 'profile'],    });  }
  async validate(    accessToken: string,    refreshToken: string,    profile: any,    done: VerifyCallback,  ): Promise<any> {    const { id, emails, photos } = profile;    const { givenName, familyName } = profile.name || {}; // Add a fallback to an empty object
    const user = {      googleId: id,      email: emails[0].value,      name: `${givenName} ${familyName}`,      picture: photos[0].value,      accessToken,    };    done(null, user);  }}
// เพิ่ม auth/google-auth.guard.ts เพื่อให้เรียกใช้งานใน Controller ได้import { Injectable } from '@nestjs/common';import { AuthGuard } from '@nestjs/passport';
@Injectable()export class GoogleAuthGuard extends AuthGuard('google') {}
ที่ Auth Service
- เพิ่มตัว
googleLoginเข้ามาเพื่อเป็น service ให้เรียกใช้งานจาก controller รับช่วงต่อหลังจากที่ผ่าน Google Login มาได้แล้วเรียบร้อย (เพื่อทำการเช็คกับข้อมูลใน database ว่าจำเป็นต้องสร้างเป็น user ใหม่ขึ้นมาหรือไม่) - หลังจากนั้นทำการส่งต่อ access token (ที่ generate จาก jwt เดียวกันกับตอน login ด้วย email, password) ส่งต่อออกไป
import { Injectable } from '@nestjs/common';import { JwtService } from '@nestjs/jwt';import { UserService } from '../user/user.service';import * as bcrypt from 'bcrypt';import { InjectModel } from '@nestjs/mongoose';import { Model } from 'mongoose';import { User, UserDocument } from '../user/schemas/user.schema';
@Injectable()export class AuthService {  constructor(    private userService: UserService,    private jwtService: JwtService,    @InjectModel(User.name) private userModel: Model<UserDocument>,  ) {}
  // เพิ่ม google Login เข้ามา  async googleLogin(req): Promise<any> {    if (!req.user) {      throw new Error('Google login failed: No user information received.');    }
    const { email, name, picture, googleId } = req.user;    let user = await this.userModel.findOne({ email });
    if (!user) {      user = new this.userModel({        email,        name,        picture,        googleId,      });      await user.save();    }
    const payload = { email: user.email };
    return {      accessToken: this.jwtService.sign(payload),    };  }}
ที่ auth.controller.ts ทำการเพิ่ม route ทั้งหมด 2 route ขึ้นมาโดยทั้ง 2 routes นี้ทำการเรียกใช้ผ่าน GoogleAuthGuard โดย
- GET
/googleสำหรับทำ redirect ไปยัง OAuth ของ Sign in Google (ไปยังหน้า Login ของ Google) - GET
/google/callbackสำหรับทำ url callback รับหลังจาก redirect กลับมาจาก Google พร้อมกับข้อมูล และเรียกใช้googleLogin()เพื่อให้ได้ access token pattern เดียวกันที่ใช้งานใน JWT Strategy ต่อได้ - อีก 1 path คือ GET
/logoutสำหรับนำ cookie ออกเพื่อทำการ logout ออกไป (อันนี้เพิ่มเติมไว้เพื่อ support การ logout ทั้งเคสปกติและ Sign in Google)
import { Controller, Get, Post, UseGuards, Request, Res } from '@nestjs/common';import { AuthService } from './auth.service';import { LocalAuthGuard } from './local-auth.guard';import { GoogleAuthGuard } from './google-auth.guard';
import { Response } from 'express';
@Controller('auth')export class AuthController {  constructor(private authService: AuthService) {}
  // เพิ่มส่วนที่เกี่ยวกับ google  @Get('google')  @UseGuards(GoogleAuthGuard)  async googleAuth(@Request() req) {    // Initiates the Google OAuth process  }
  @Get('google/callback')  @UseGuards(GoogleAuthGuard)  async googleAuthRedirect(@Request() req, @Res() res: Response) {    const { accessToken } = await this.authService.googleLogin(req);    res.cookie('access_token', accessToken, {      httpOnly: true,    });    res.redirect('/users/profile');  }
  // เพิ่ม logout  @Get('logout')  async logout(@Request() req, @Res() res: Response) {    res.clearCookie('jwt token', {      httpOnly: true,    });    return res.json({ message: 'Successfully logged out' });  }}
สุดท้ายที่ auth.module.ts ทำการ import GoogleStrategy เข้ามาใน provider เพื่อทำการ inject เข้ากับ Controller เพื่อให้สามารถเรียกใช้งานใน Controller ได้
// import เพิ่มเข้ามาimport { UserModule } from '../user/user.module';import { GoogleStrategy } from './strategies/google.strategy';
import { ConfigService, ConfigModule } from '@nestjs/config';
@Module({  // เพิ่ม GoogleStrategy  providers: [AuthService, JwtStrategy, LocalStrategy, GoogleStrategy],})export class AuthModule {}
ผลลัพธ์
สรุปทั้งหมด
สรุปการใช้งาน NestJS ร่วมกับ Passport ในการจัดการระบบ Authentication ทั้งการ login ผ่าน token, cookie และ Google มีขั้นตอนดังนี้
- การ Login ผ่าน Token (JWT)
- ติดตั้ง
@nestjs/passport,passport,passport-jwt - สร้าง
AuthModule,AuthService,JwtStrategy - ในการ login ให้
AuthServiceตรวจสอบข้อมูลผู้ใช้และสร้าง JWT token - ใช้
JwtStrategyในการตรวจสอบ token ที่ส่งมาใน HTTP header - ใช้ JWT Guard เพื่อป้องกันการเข้าถึง route ที่ต้องการให้ผ่านการยืนยันตัวตนก่อน
- การ Login ผ่าน Cookie
- ติดตั้ง
cookie-parser - เพิ่ม
cookie-parsermiddleware ใน main.ts - ในการ login ให้
AuthServiceสร้าง JWT token และบันทึกลงใน cookie - ใช้ JWT Guard ร่วมกับการตรวจสอบ cookie เพื่อยืนยันตัวตนจาก token ใน cookie
- การ Login ผ่าน Google
- ติดตั้ง
passport-google-oauth20 - สร้าง
GoogleStrategyที่ extend จากPassportStrategy - กำหนด
clientID,clientSecretและcallbackURLสำหรับ Google OAuth - สร้าง
AuthControllerที่มี route สำหรับเริ่มการ login ผ่าน Google - เมื่อผู้ใช้ยืนยันการอนุญาตแล้ว Google จะส่งข้อมูลผู้ใช้กลับมายัง callback URL
GoogleStrategyจะได้รับข้อมูลผู้ใช้และ AuthService จะสร้าง JWT token
โดยทั่วไปแล้ว Passport จะทำหน้าที่เป็น middleware ในการยืนยันตัวตนของผู้ใช้ โดยใช้ Strategy ต่างๆ เช่น Local, JWT, Google เป็นต้น ส่วน NestJS จะทำหน้าที่เป็น framework หลักในการสร้างแอปพลิเคชัน พร้อมทั้งจัดการการไหลของข้อมูลและการทำงานต่างๆ
การใช้งานร่วมกันของ NestJS และ Passport ทำให้เราสามารถสร้างระบบ Authentication ที่ปลอดภัยและมีประสิทธิภาพ รองรับการยืนยันตัวตนหลากหลายวิธี ทั้งผ่าน token, cookie หรือบริการของบุคคลที่สามอย่าง Google ได้อย่างง่ายดาย หวังว่าบทความและ video นี้จะเป็นส่วนหนึ่งที่ช่วยทำให้เห็นภาพ NestJS และ Passport มากขึ้นนะครับ
- ทำเว็บ Blog ด้วย Next.js และ Strapiมี Video
ภาคต่อจาก Next.js เราจะลองนำ Next.js มาสร้างเว็บ Content จริงๆกันผ่าน Strapi

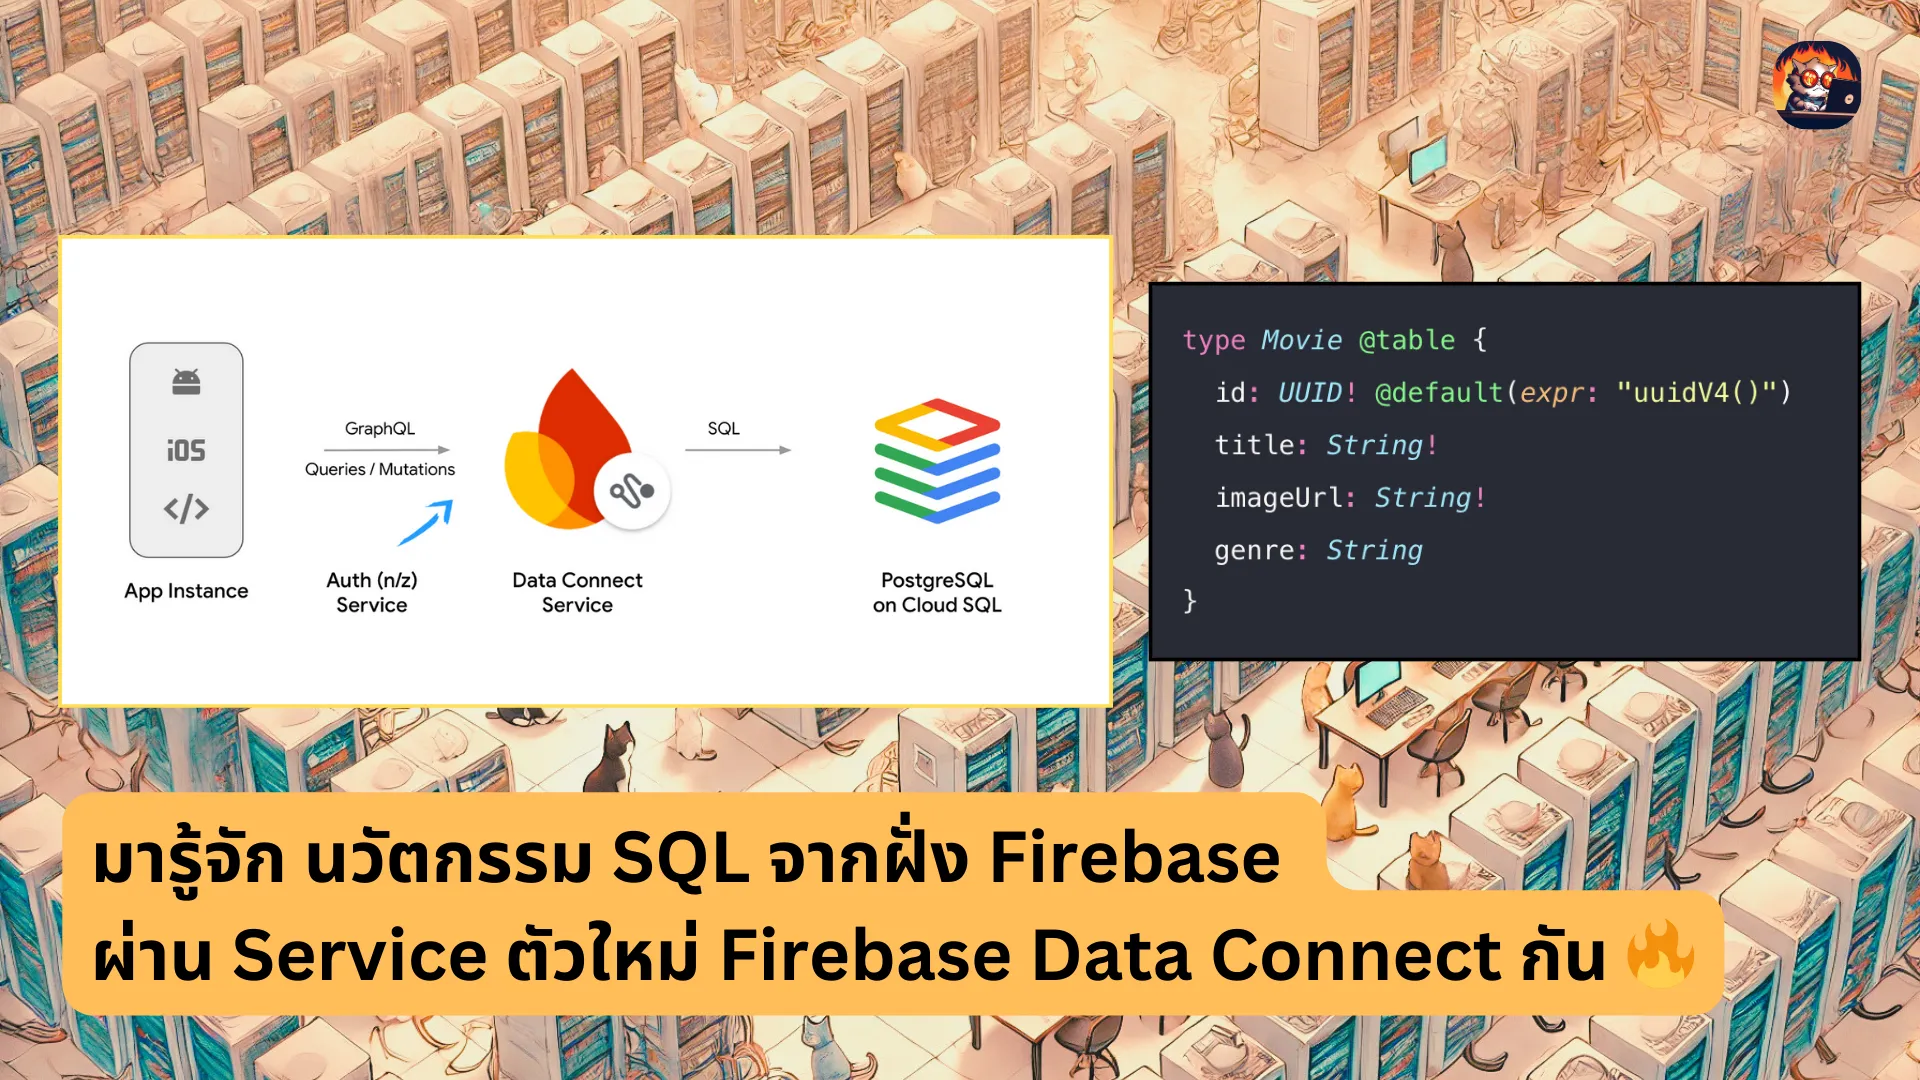
- ลอง Firebase Data Connectมี Github
มารู้จัก นวัตกรรม SQL จากฝั่ง Firebase ผ่าน Service ตัวใหม่ Firebase Data Connect กัน
- มาลองทำ Upload file แต่ละเคสกันมี Video มี Github
มาลองทำ upload ไฟล์ โดยจะลองมาทำ upload แบบทั่วไป, ทำ progress upload, validate file และ ยกเลิกการ upload

- มารู้จักกับ gRPC และ Go กันมี Video
เรียนรู้การใช้งาน gRPC กับ Go ตั้งแต่การสร้าง Protocol Buffers, การทำ Server/Client และการจัดการ Error รวมถึง Best Practice ในการใช้ API Gateway