Oct 18, 2023
มาเรียน Canvas ผ่าน Pong game กัน
มารู้จักกับ HTML Canvas ว่ามันคืออะไร ใช้ทำอะไรบ้าง และมารู้จักพื้นฐานเบื้องต้นของการทำ Animation บน Browser ว่ามีหลักการเป็นประมาณไหน
สารบัญ
สามารถดู video ของหัวข้อนี้ก่อนได้ ดู video
มาเรียนรู้ canvas ผ่านการสร้าง Pong game กัน ว่า
- animation ที่เคลื่อนได้บน canvas ทำได้ยังไง
- ตำแหน่งบน canvas ดูยังไง
- เราทำอะไรบน canvas ได้บ้าง
Canvas คืออะไร ?
Ref: https://www.w3schools.com/html/html5_canvas.asp
Canvas เป็น feature ด้านกราฟฟิคที่เตรียมมาไว้ใน HTML5 ที่สามารถทำให้เรา "วาดภาพ" บน html ได้ (ตามชื่อของมันเลยคือ ผ้าใบที่วาดภาพได้)
<canvas width="200" height="100"></canvas>วาดของบน Canvas ได้ยังไง ?
คำสั่ง Javascript นั้นสามารถ access เข้าถึง Canvas และสามารถวาดลงไปบน Canvas ได้ มันก็จะมีตั้งแต่
- วาดเส้น
const ctx = canvas.getContext("2d");
ctx.moveTo(0, 0);
ctx.lineTo(200, 100);
ctx.stroke();- วาดวงกลม
const ctx = canvas.getContext("2d");
ctx.beginPath();
ctx.arc(95, 50, 40, 0, 2 * Math.PI);
ctx.stroke();- วาดสี่เหลี่ยม
const ctx = canvas.getContext("2d");

// Filled Rectangle
ctx.fillStyle = "blue";
ctx.fillRect(10, 10, 100, 50);

// Stroked Rectangle
ctx.strokeStyle = "red";
ctx.strokeRect(120, 10, 100, 50);

// Clear a section of the canvas
ctx.clearRect(50, 30, 30, 20);- วาดเส้นโค้ง
const ctx = canvas.getContext("2d");

// Elliptical arc using quadratic curves
ctx.beginPath();
ctx.moveTo(300, 100);
ctx.quadraticCurveTo(350, 50, 400, 100);
ctx.quadraticCurveTo(350, 150, 300, 100);
ctx.fillStyle = "purple";
ctx.fill();- ลงตัวอักษร
const ctx = canvas.getContext("2d");
ctx.font = "30px Arial";
ctx.fillText("Hello World", 10, 50);- ลงสี
// Create gradient
const ctx = canvas.getContext("2d");
const grd = ctx.createLinearGradient(0, 0, 200, 0);
grd.addColorStop(0, "red");
grd.addColorStop(1, "white");

// Fill with gradient
ctx.fillStyle = grd;
ctx.fillRect(10, 10, 150, 80);- ลงรูป
const ctx = canvas.getContext("2d");
// access ไปยังรูป
const img = document.getElementById("scream");
// วาดรูปลง canvas
ctx.drawImage(img, 10, 10);
Animation ใน canvas เกิดขึ้นได้ยังไง ?
คำสั่งที่ทำให้เราสามารถวาดได้คือ requestAnimationFrame()
- canvas ฮิตมากสำหรับใช้คู่กับการทำ Animation (มันให้อารมณ์วาดการตูนบนแผ่นกระดาษแล้วซ้อน frame กัน)
- คำสั่ง
requestAnimationFrame()คือคำสั่งสำหรับการทำ loop คำสั่งแบบ 60 fps (60 execute ใน 1 วินาที) - ดีกว่า setInterval ตรงที่มันจะ "ไม่" ทำงานเมื่อไม่อยู่ใน tab อื่น = ประหยัดการทำงานมากกว่า
มาลองทำ Pong game กัน
สิ่งที่เราจะทำ
- ปู canvas ออกมา
- สร้าง paddle (แผ่นตี pong game) และ ลูกปิงปองขึ้นมา
- สร้างให้ปิงปองและ cpu paddle เคลื่อนไหวได้ด้วย
requestAnimationFrame() - สร้าง การชนของ paddle ออกมา เพื่อให้เกิดการเด้งกลับ
- ทำให้ paddle ตัวเองให้เคลื่อนไหวด้วย เมาส์
= เราก็จะได้ pong game หน้าตาแบบนี้ออกมา
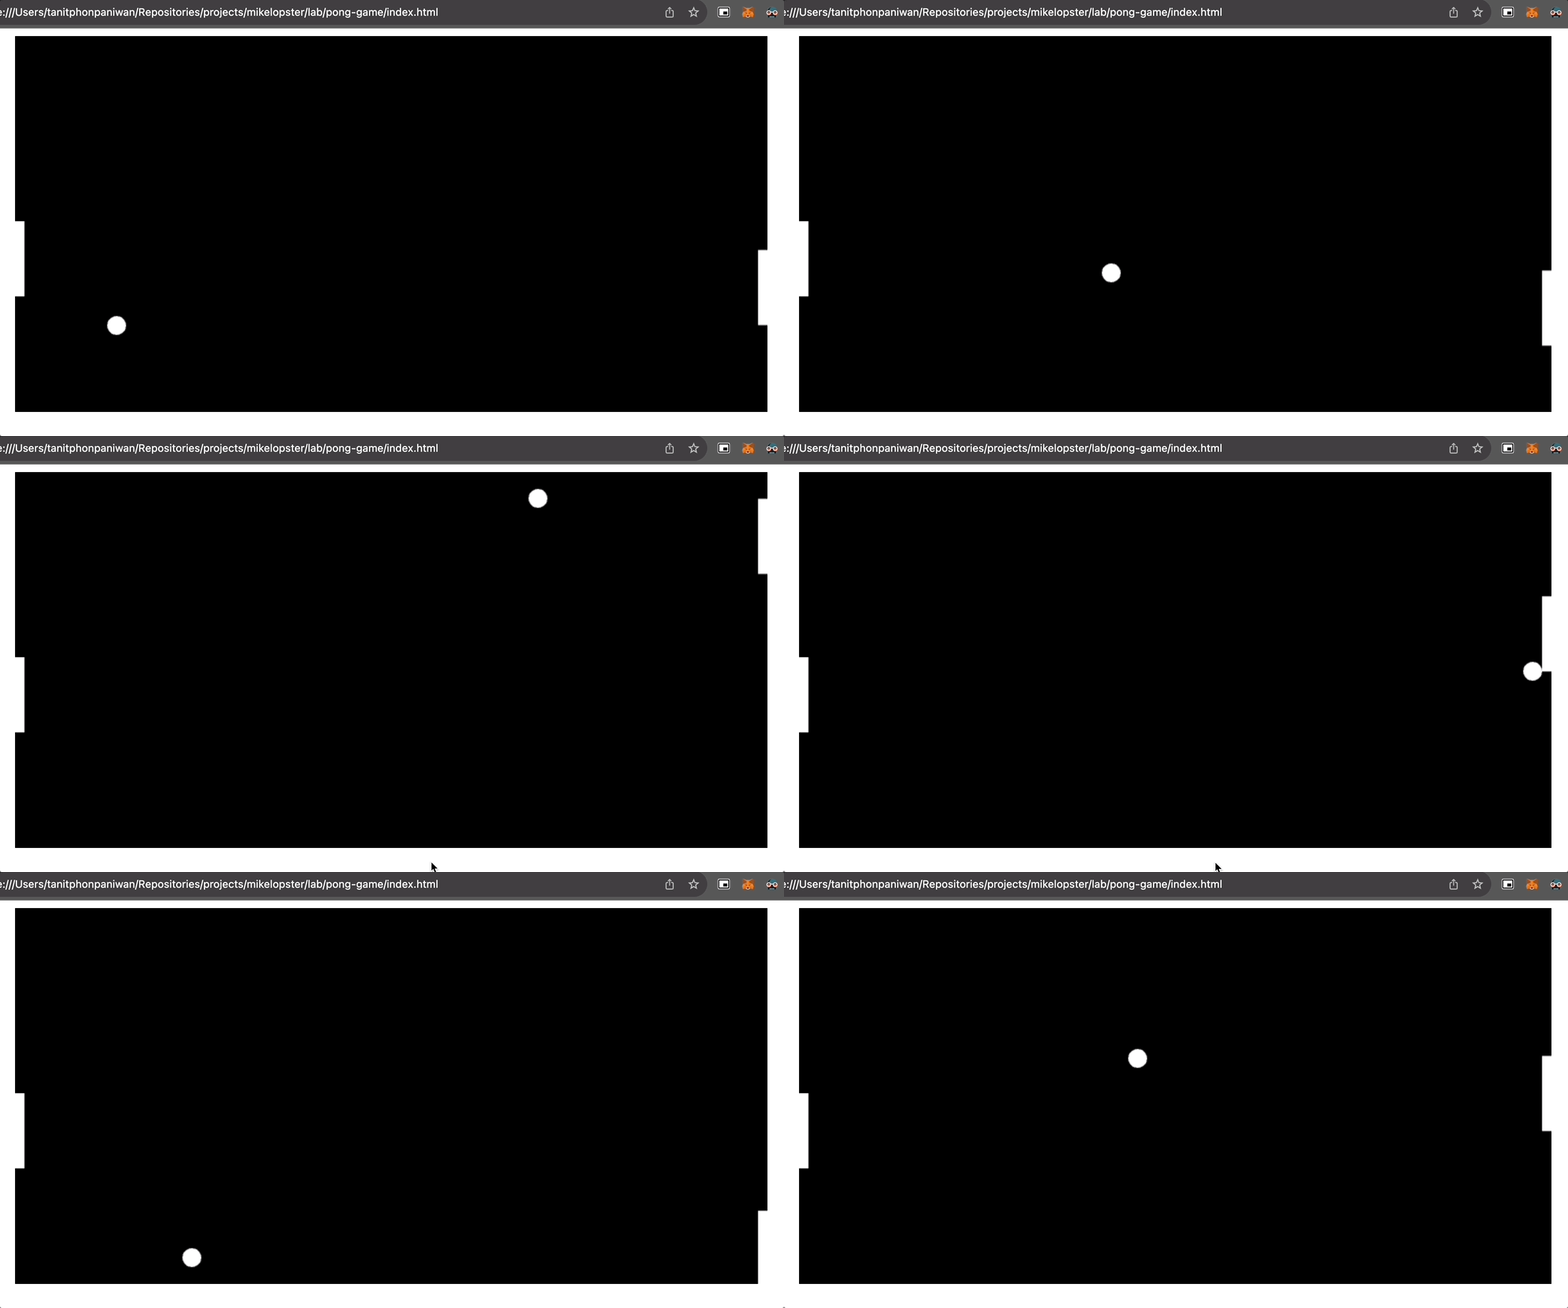
เรามาเริ่มทำกันในแต่ละ step
สร้าง canvas และ selector ออกมาก่อน
!DOCTYPE html>
<html lang="en">
  <head>
    <meta charset="UTF-8" />
    <meta name="viewport" content="width=device-width, initial-scale=1.0" />
    <title>Pong Game</title>
    <style>
      canvas {
          background-color: #000
          display: block
          margin: 0 auto
      }
    </style>
  </head>
  <body>
    <canvas id="pong" width="800" height="400"></canvas>

    <script>
      const canvas = document.getElementById("pong");
      const ctx = canvas.getContext("2d");

      /* ที่เหลือเราจะมาใส่ code ตรงนี้กัน */
    </script>
  </body>
</html>
สร้าง paddle (แผ่นตี pong game) และ ลูกปิงปองขึ้นมา
<script>
  // สร้าง canvas ball
  const ball = {
    x: canvas.width / 2,
    y: canvas.height / 2,
    radius: 10,
    speed: 4,
    dx: 4,
    dy: 4,
    color: "WHITE",
  };

  // สร้าง canvas ฝั่ง user
  const userPaddle = {
    x: 0,
    y: canvas.height / 2 - 40,
    width: 10,
    height: 80,
    dy: 4,
    color: "WHITE",
  };

  // สร้าง canvas ฝั่ง computer
  const compPaddle = {
    x: canvas.width - 10,
    y: canvas.height / 2 - 40,
    width: 10,
    height: 80,
    dy: 4,
    color: "WHITE",
  };

  function drawRect(x, y, width, height, color) {
    ctx.fillStyle = color;
    ctx.fillRect(x, y, width, height);
  }

  function drawCircle(x, y, radius, color) {
    ctx.fillStyle = color;
    ctx.beginPath();
    ctx.arc(x, y, radius, 0, Math.PI * 2, false);
    ctx.closePath();
    ctx.fill();
  }

  // ทำการวาดออกมา
  function draw() {
    ctx.clearRect(0, 0, canvas.width, canvas.height);
    drawRect(userPaddle.x, userPaddle.y, userPaddle.width, userPaddle.height, userPaddle.color);
    drawRect(compPaddle.x, compPaddle.y, compPaddle.width, compPaddle.height, compPaddle.color);
    drawCircle(ball.x, ball.y, ball.radius, ball.color);
  }

  function game() {
    draw();
  }

  // run game
  game();
</script>
สร้างให้ปิงปองและ cpu paddle เคลื่อนไหวได้ด้วย requestAnimationFrame()
<script>
  function update() {
    // ทำให้บอลเคลื่อนไหวไปเรื่อยๆ
    ball.x += ball.dx;
    ball.y += ball.dy;

    // ออกนอกกรอบ canvas = เปลี่ยนเส้นทาง
    if (ball.y + ball.radius > canvas.height || ball.y - ball.radius < 0) {
      ball.dy = -ball.dy;
    }

    if (ball.x + ball.radius > canvas.width) {
      // กระทบ paddle cpu
      if (ball.y > compPaddle.y && ball.y < compPaddle.y + compPaddle.height) {
        ball.dx = -ball.dx;
      } else {
        // ออกจอไป = reset ลูกใหม่
        ball.x = canvas.width / 2;
        ball.y = canvas.height / 2;
        // และเปลี่ยนทิศทาง
        ball.dx = -ball.dx;
      }
    }

    if (ball.x - ball.radius < 0) {
      // กระทบ paddle ฝั่ง user
      if (ball.y > userPaddle.y && ball.y < userPaddle.y + userPaddle.height) {
        ball.dx = -ball.dx;
      } else {
        // ออกนอกจอไป = reset ใหม่
        ball.x = canvas.width / 2;
        ball.y = canvas.height / 2;
      }
    }

    // สุ่มการเคลื่อนไหวของ paddle
    compPaddle.y += (ball.y - (compPaddle.y + compPaddle.height / 2)) * 0.09;
  }

  function game() {
    // เพิ่มการเคลื่อนไหว
    update();
    draw();
    // เพิ่มการเรียกในแต่ละ frame
    requestAnimationFrame(game);
  }

  // run game
  game();
</script>
ทำให้ paddle ตัวเองให้เคลื่อนไหวด้วย เมาส์
<script>
  // เพิ่มการเคลื่อนไหว canvas ด้วยเมาส์
  canvas.addEventListener("mousemove", (event) => {
    const rect = canvas.getBoundingClientRect();
    userPaddle.y = event.clientY - rect.top - userPaddle.height / 2;
  });
</script>
ปกติ canvas ใช้ทำอะไรบ้าง
- Drawing Applications ใช้ทำพวก image editor, stecth pad (คล้ายๆกับพวก Microsoft Paint) ** พวก web app อะไรก็ตามที่ต้องอาศัยการจัดการ UI แบบ Custom = จะใช้พวก canvas นี่แหละ ช่วยได้
- Games อย่างที่เห็น เมื่อใช้ Canvas ผสมกับการ render animation = สามารถที่จะ render graphic ที่มี animation ได้ มันเลยกลายเป็น base ของการทำ game ได้
- Animations ใช้ทำพวก animation ร่วมกับ user input ได้ (เช่นเคสการเล่นกับเมาส์, การคลิก)
- Photo Manipulation ใช้ร่วมกับการจัดการภาพ ภาพมันสามารถนำมาแสดงผลบน canvas และ สามารถแทรก filter, ปรับสีและสามารถใช้ effect ร่วมกับภาพบน canvas ได้
อะไรก็ตามที่อาศัยการวาด, การทำ animation และการจัดการกับ Event ของ User = Canvas สามารถช่วยคุณได้